Agile Resource Management
Introduction
Traditional or Agile Resource Management?
How to use the feature
Roles and permissions
Introduction
Can you imagine combining the best of classic resource management and agile project management in a single tool? We do. That's why we present a module for clearly assigning teams and users to projects from the top-level perspective – agile resource management including built-in skills management. It is an easy-to-use visual tool that is an alternative to classic resource management and is an ideal helper if you are dealing with more than 10 projects at once.
To maximize clarity and simplicity, this tool uses only basic dimensions (project, teams, workers, time). Skills management helps allocate specialists and experts to work that makes the best use of their skills. Keep project, team, and people collaboration harmony at your fingertips. Manage your resources in an agile way.
This module represents a new level of optimization of your resources and thus the overall efficiency of your project management. The combination of all these benefits consequently means less stress, better relationships, fewer conflicts, a better atmosphere at the workplace, and ultimately better delivery for the end customer.
Key features:
- Easy and visual tool for planning resources from the top level
- Alternative variant for classic resource management
- Agile teams allocation
- Portfolio resource allocation – input for and output of the planning
- Only basic dimensions (project, teams, workers, time)
- Skills management – helps to allocate specialists and experts
Traditional or Agile Resource Management?
This section explains the difference between the two resource managements that are part of the Business and Platform plans. What do (and don’t) they have in common? Very little. Except for the name, they share the main purpose – assignment of workload to available capacities. When we see how each fulfills this main purpose, it becomes clear that the common elements diverge quickly. It is very important to realize that they DO NOT have any functional connection. The following comparison table provides an overview of the differences in phrases.
| Agile Resource Management | Resource Management | |
| Level of detail | High-level planning | Micromanagement |
| Measuring units | Weeks | Hours |
| Dimensions | Project view, Team view, User view | User view, Group view |
| Onboarding | Introduce basic principles | Professional implementation |
| Freedom of use | Independent from the rest of the application | Tightly connected to tasks‘ and project‘ rules and limitations |
| Time span | Future only | Future and past |
| Feature set | Basic, intuitive | Vast, expert |
| Feature set | Yes | No |
| Reports | No | Yes |
How to decide
To translate the table into understandable stories, here are a few helpful hints. You should realize which statements resonate most with you.
Agile Resource Management is designed for:
- Directors deciding about the company's long-term priorities because it allows to easily assign capacities to projects even months ahead
- Directors ensuring that the company's superstars are used for the right projects at the right time because the skills management features allow to pinpoint the top talent allocations
- Directors looking at the big picture because it shows all the most important information without unnecessary detail
- Managers seeing different perspectives because of its 3 types of views – projects, teams, workers
- Managers who avoid micromanagement because it clearly visualizes what the workers are assigned to
- Managers empowering functional teamwork because it allows to form teams with compatible and complementary skillsets
- Goal-oriented managers because it is quick to adopt, smooth to operate, and never becomes a distraction
- Team players because the personal widget shows not only your projects but also coworkers on those projects
- Directors, managers, and workers looking ahead because it is a planning tool working only with the future
Agile Resource Management is not intended for:
- Generating numeric reports
- Project progress or status visualization
- Proportional load planning (% resource allocations per time period)
- Micromanagement
- Looking into the past
- Controlling
Resource Management is designed for:
- Directors exercising full control because it works in deep detail, in form of hourly allocations
- Directors craving detailed reports because of the specialized dashboard and its widgets
- Managers planning precisely because it allows automatic, as well as manual hourly allocations per user/day
- Tech savvy managers because it adheres to various own configurations and some from the rest of the application
- Managers evaluating numbers because of the specialized dashboard and its widgets
- Self-managing workers because of the personal widget
Resource Management is not intended for:
- Users without proper training
- Simple operating
How to use the feature
There are two ways to approach Agile Resource Management. The first of them is an item in the Global menu >> Business >> Agile resources.
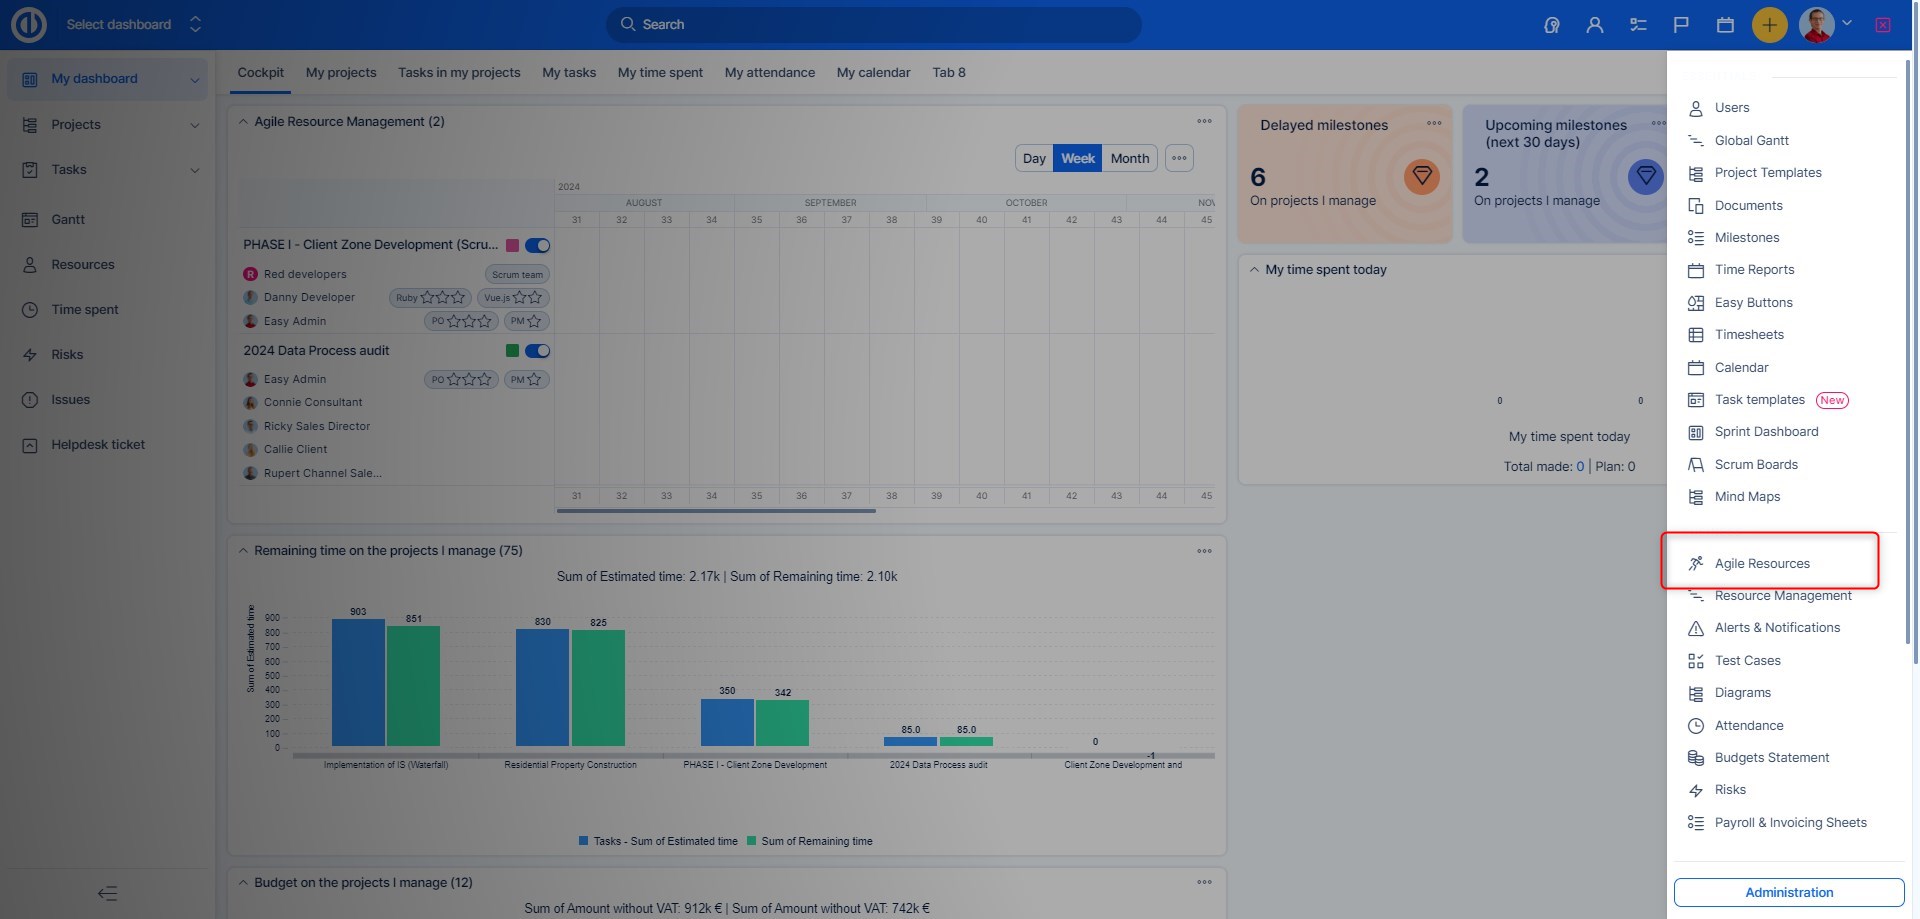
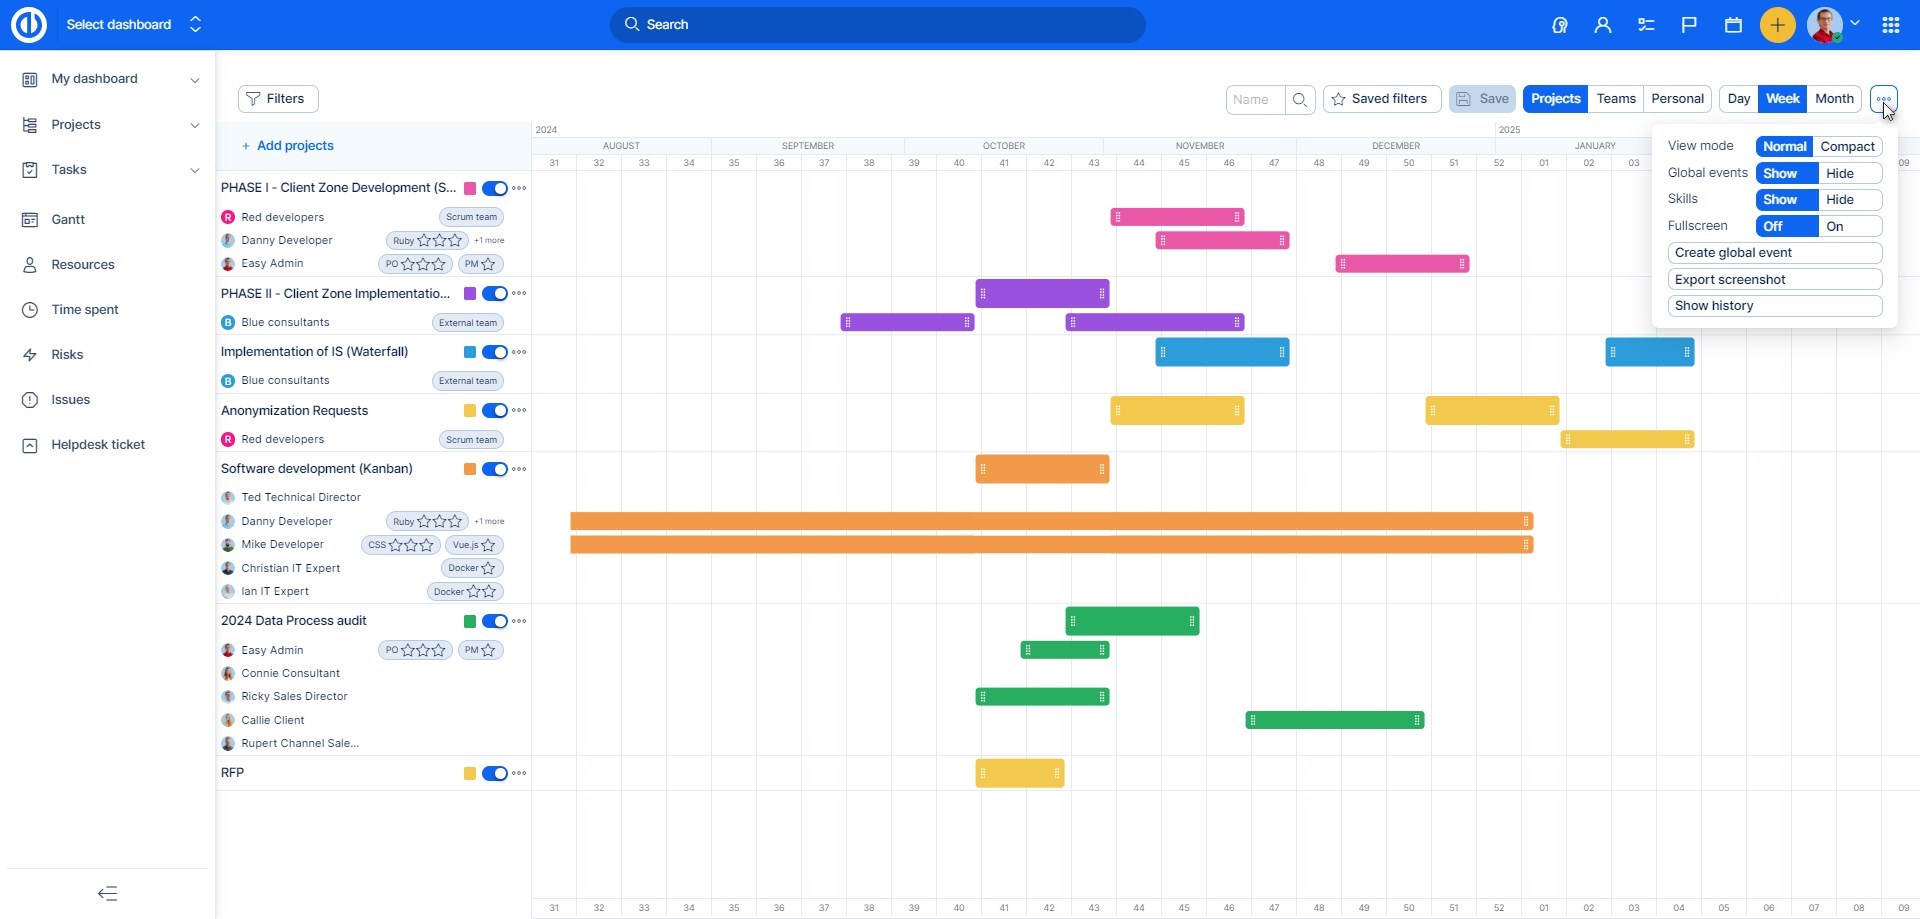
This will take you to a page dedicated exclusively to this tool, including all settings and filtering options. Let's explain the options you'll find in the top bar.
- Filters: Here you can add an unlimited amount of filtering criteria for the allocations displayed on the timeline. Click the Delete all button to delete all selected filters.
- Search box: Here you can enter any search word or part of it, based on which only data corresponding to this search word (e.g. projects, teams, workers) will be displayed on the timeline.
- Saved filters: Here you can quickly select one of your saved filters instead of manually configuring your filtering criteria.
- Projects, teams, workers: Here you choose whether you want to see allocations structured as per projects, teams, or workers on the timeline.
- Day, week, month: Here you choose the zoom level on the timeline depending on how large a period of time you need to work with.
- Global menu: Here you have the option to change the display mode (normal, compact), show or hide global events, skills management, or activate fullscreen view for better visibility. With the help of the buttons below, you can create a global event that will show on the timeline on a certain date including entered name and comment, you also have the option to export (download) a screenshot of the timeline in JPEG or PNG format, and finally, you can view the history of changes made in this tool, including filtering options for the history.
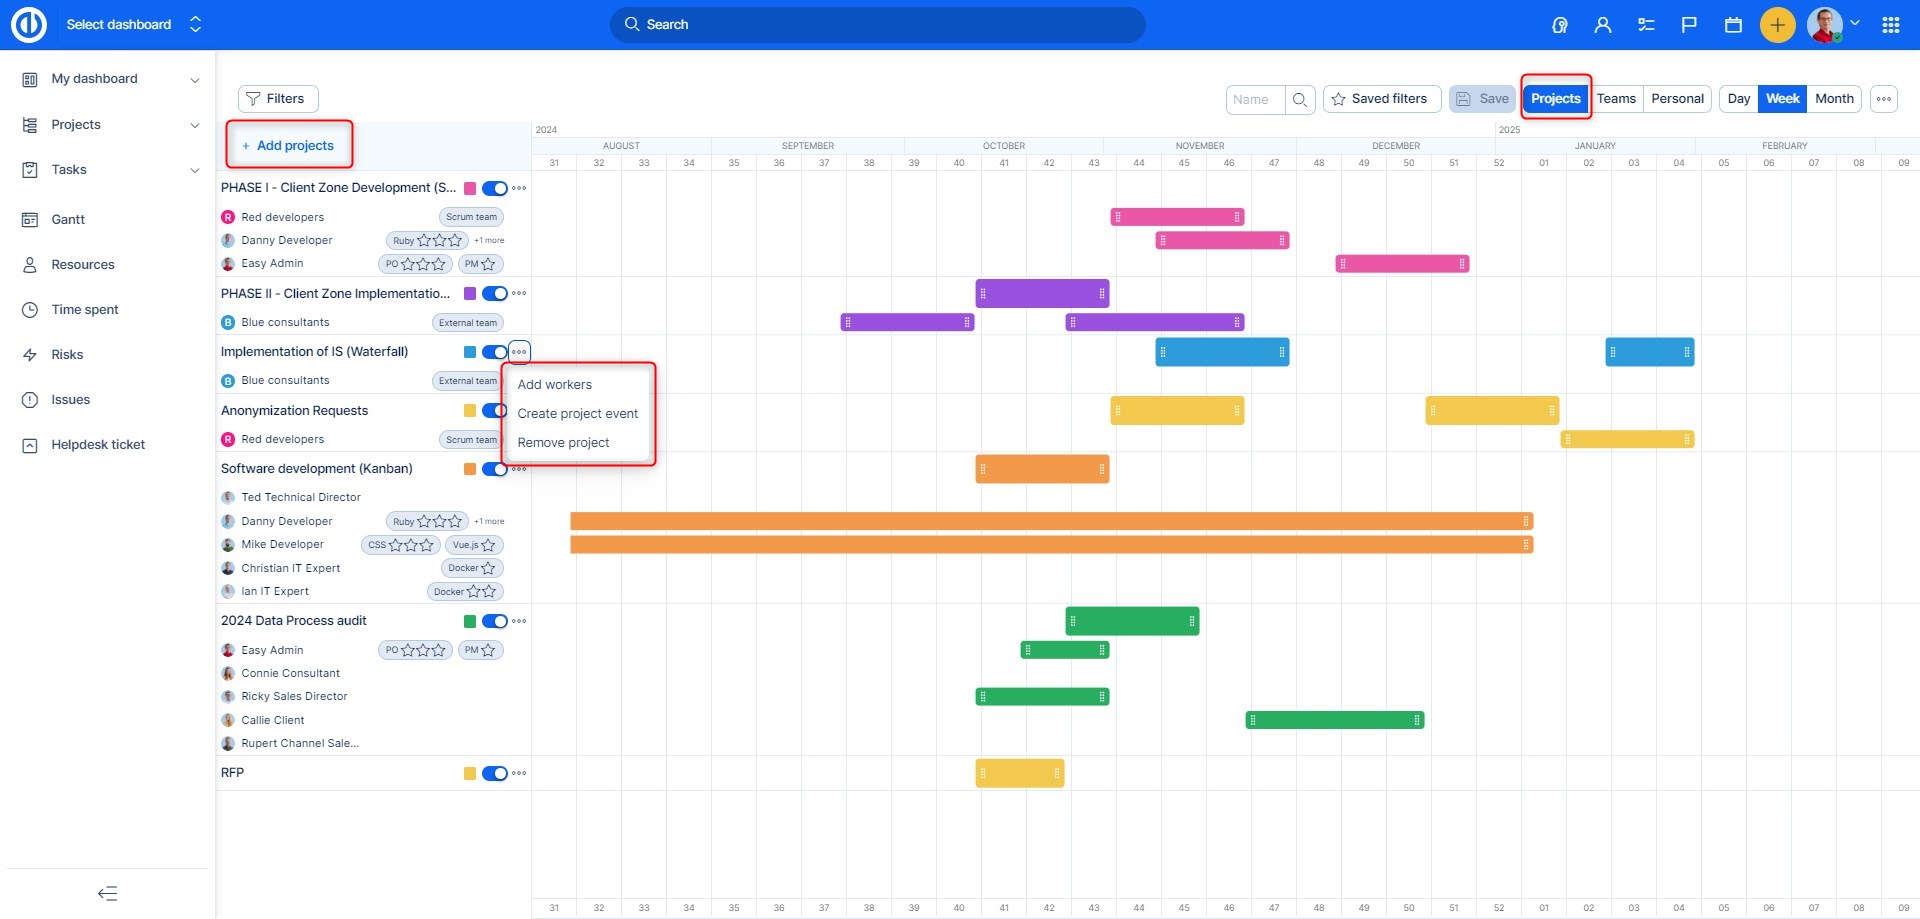
- Add projects: If you have allocations by projects displayed on the timeline, you will see a button using which you can add any of the existing projects to the timeline.
- Create a team: If you have allocations by teams displayed on the timeline, you will see a button that allows you to create a team by entering its name, color, avatar, choosing whether it is an external or Scrum team, Sprint start date, and Sprint duration in weeks. The created team is immediately included among the other teams visible on the timeline, including the allocations you assign to it.
In the lower left part, you see a list of projects, teams, or workers according to which the allocations are structured on the timeline. Behind each list item, you see the color of that item on the timeline, there's also a toggle to quickly show/hide that item on the timeline, and right beside you'll find global menu, under which are hidden various options that you can do with the given item. For example, you can add workers to a project, create a project event, or delete a project. You can edit a team, add projects or workers to a team, or delete it. For individual workers, you can adjust their skills or show/hide parallel allocations (those will upon activation show only in the team view. ). You can freely change the order of individual projects, teams, and workers in the list using the drag-and-drop function.
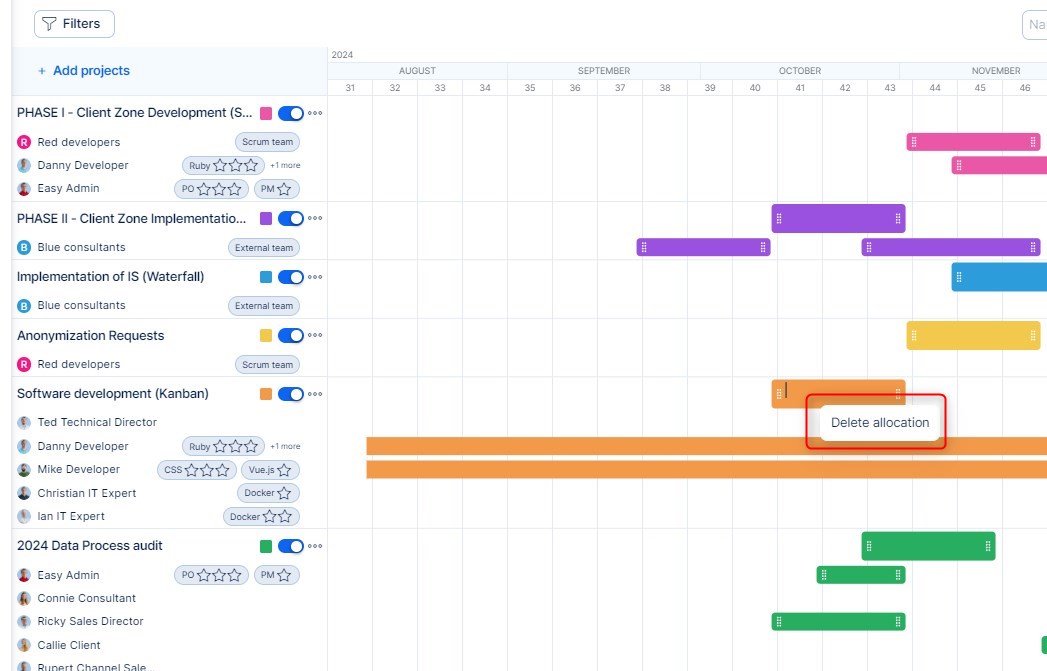
In the lower right part, there is a timeline, where you can see colored bars showing allocations, i.e. the workload of a given project, team, or worker over time. These allocations are color-coded for better clarity, and you can lengthen or shorten them as you like by moving the edge of the given allocation (using the drag-and-drop function). You create a new allocation by double-clicking the left mouse button anywhere on the timeline. To delete allocations, click the right mouse button on the given allocation and select Delete allocation.
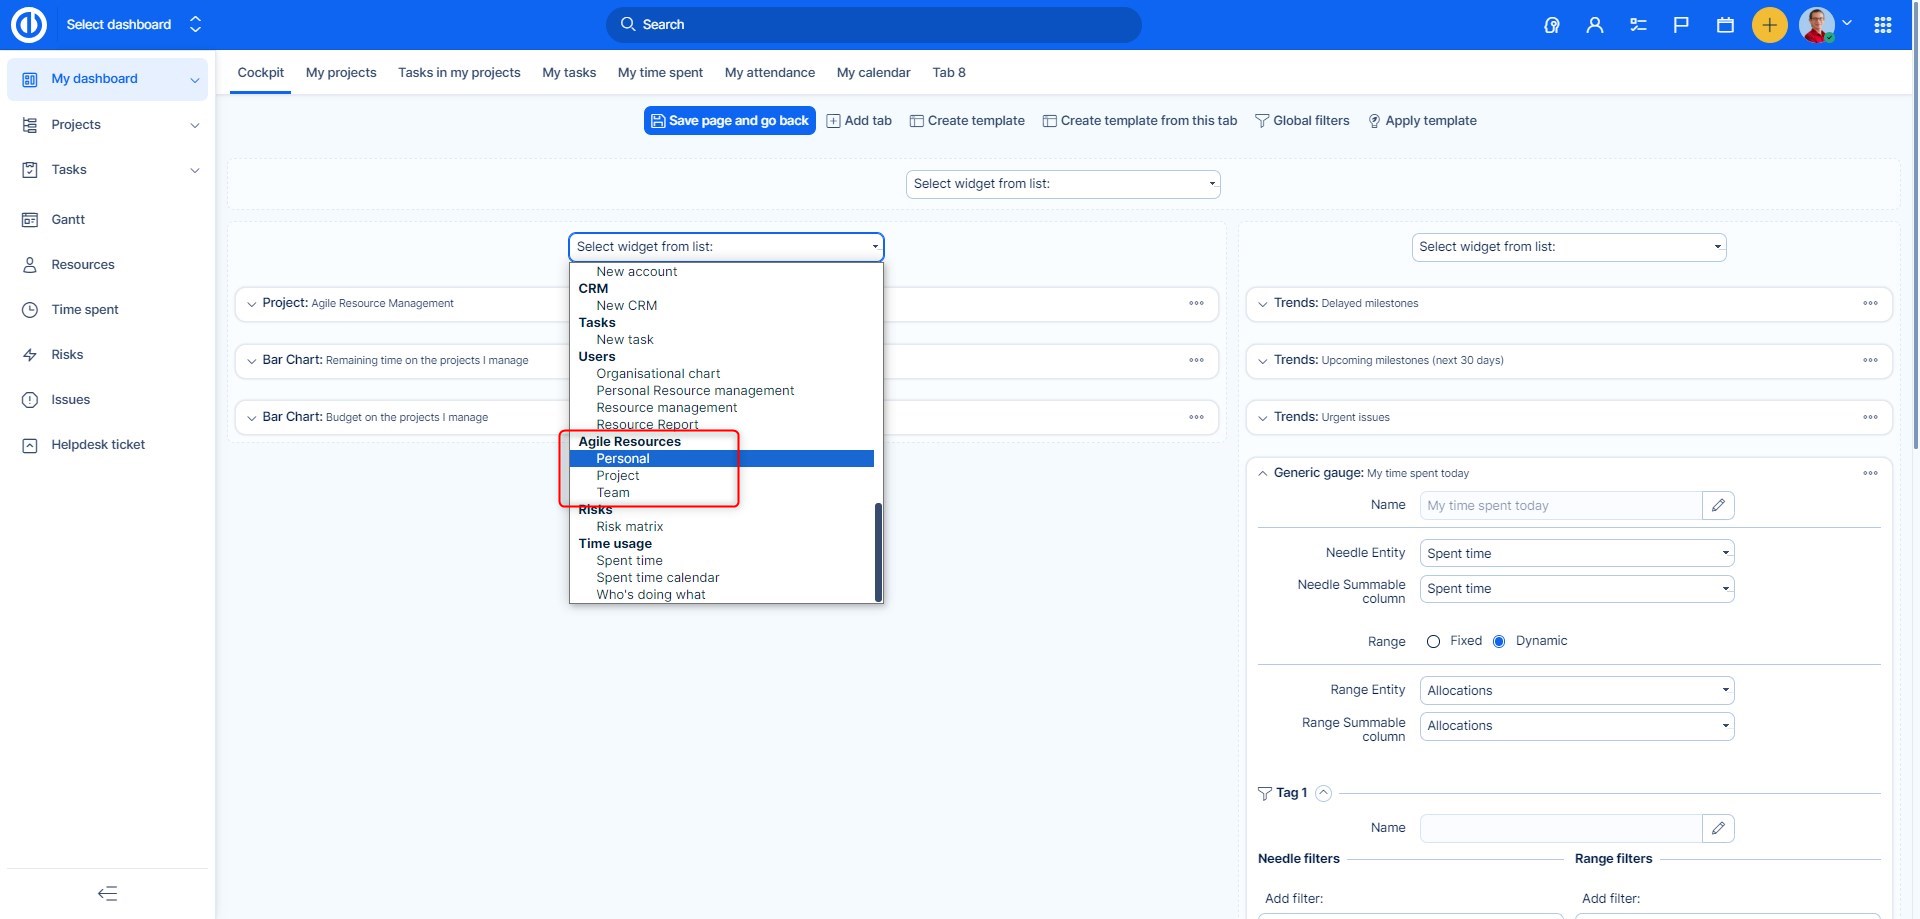
The second way to approach Agile Resource Management is the widget on My dashboard. Simply go to any personal page and click the Customize this page button at the bottom. Look for the Agile Resource Management section in the list of widgets and select one of the two options: project and personal. As you can see, the widget on the dashboard is always limited to the project or personal view and you cannot switch between them in real time. However, you can add an unlimited number of these widgets with different settings to one page. Within the widget settings, you can choose the name of the widget and preset the filtering criteria.
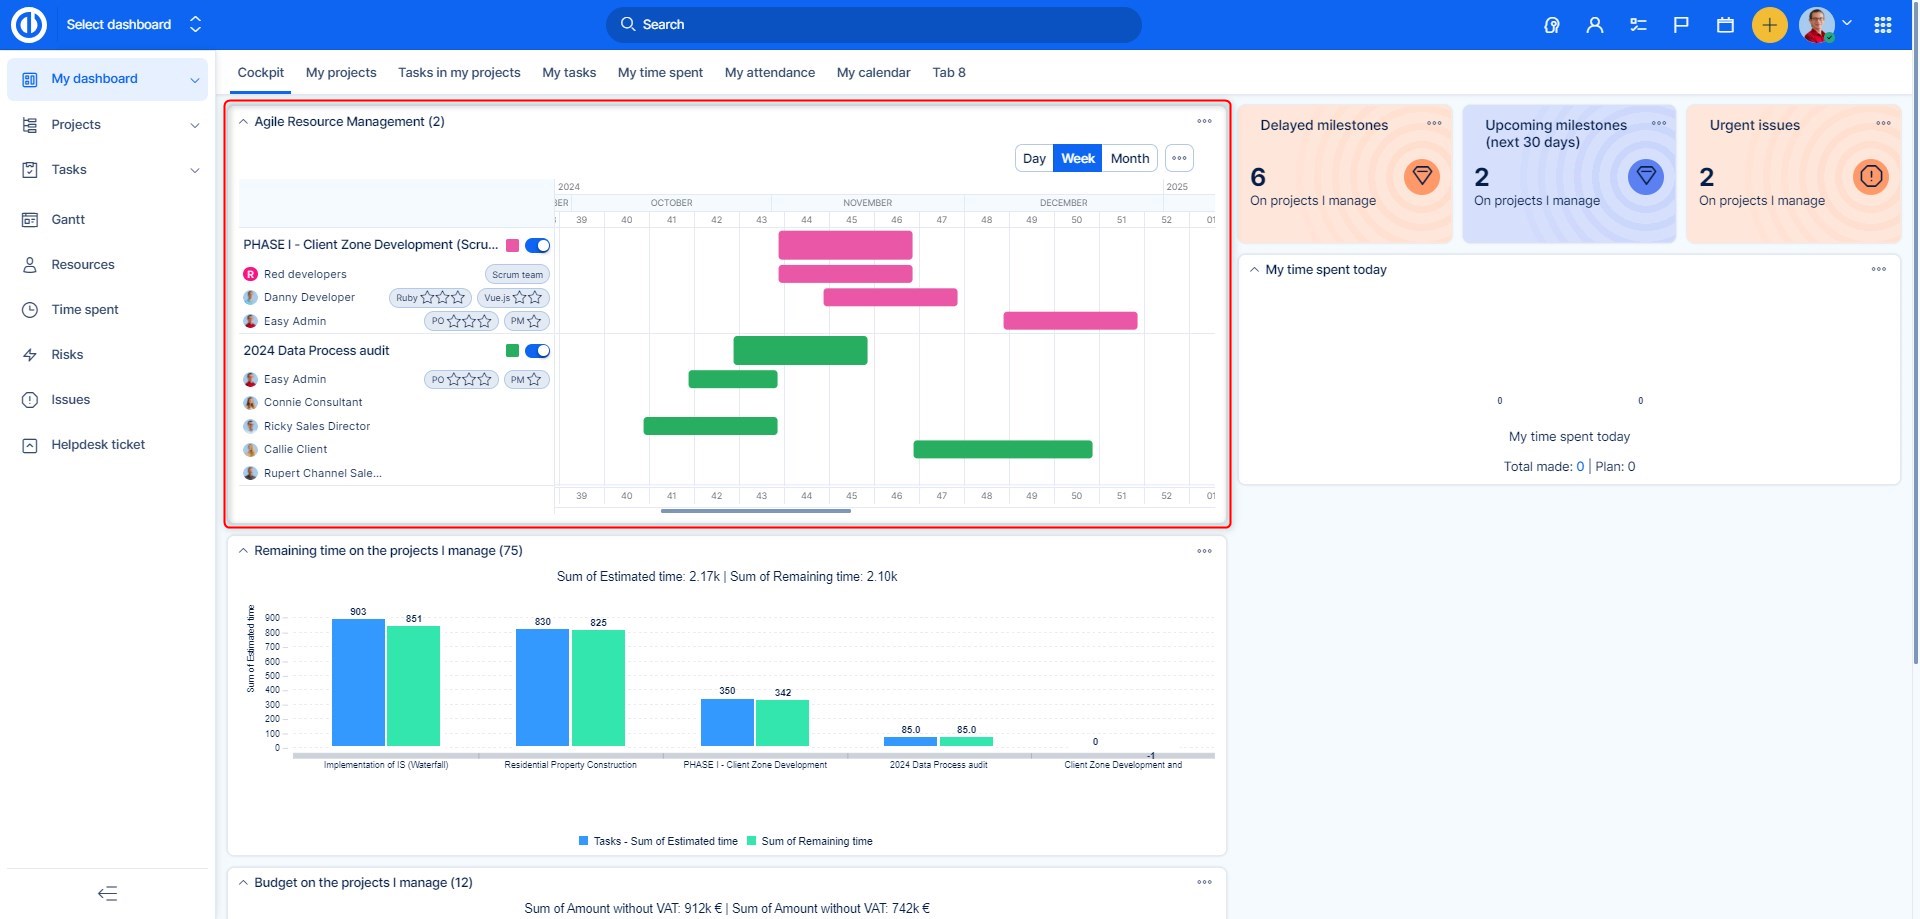
Once you save the changes, you will immediately see the widget on your Dashboard. You can switch between different time periods (day, week, month) directly on the widget, and there are also global menu with additional display options.
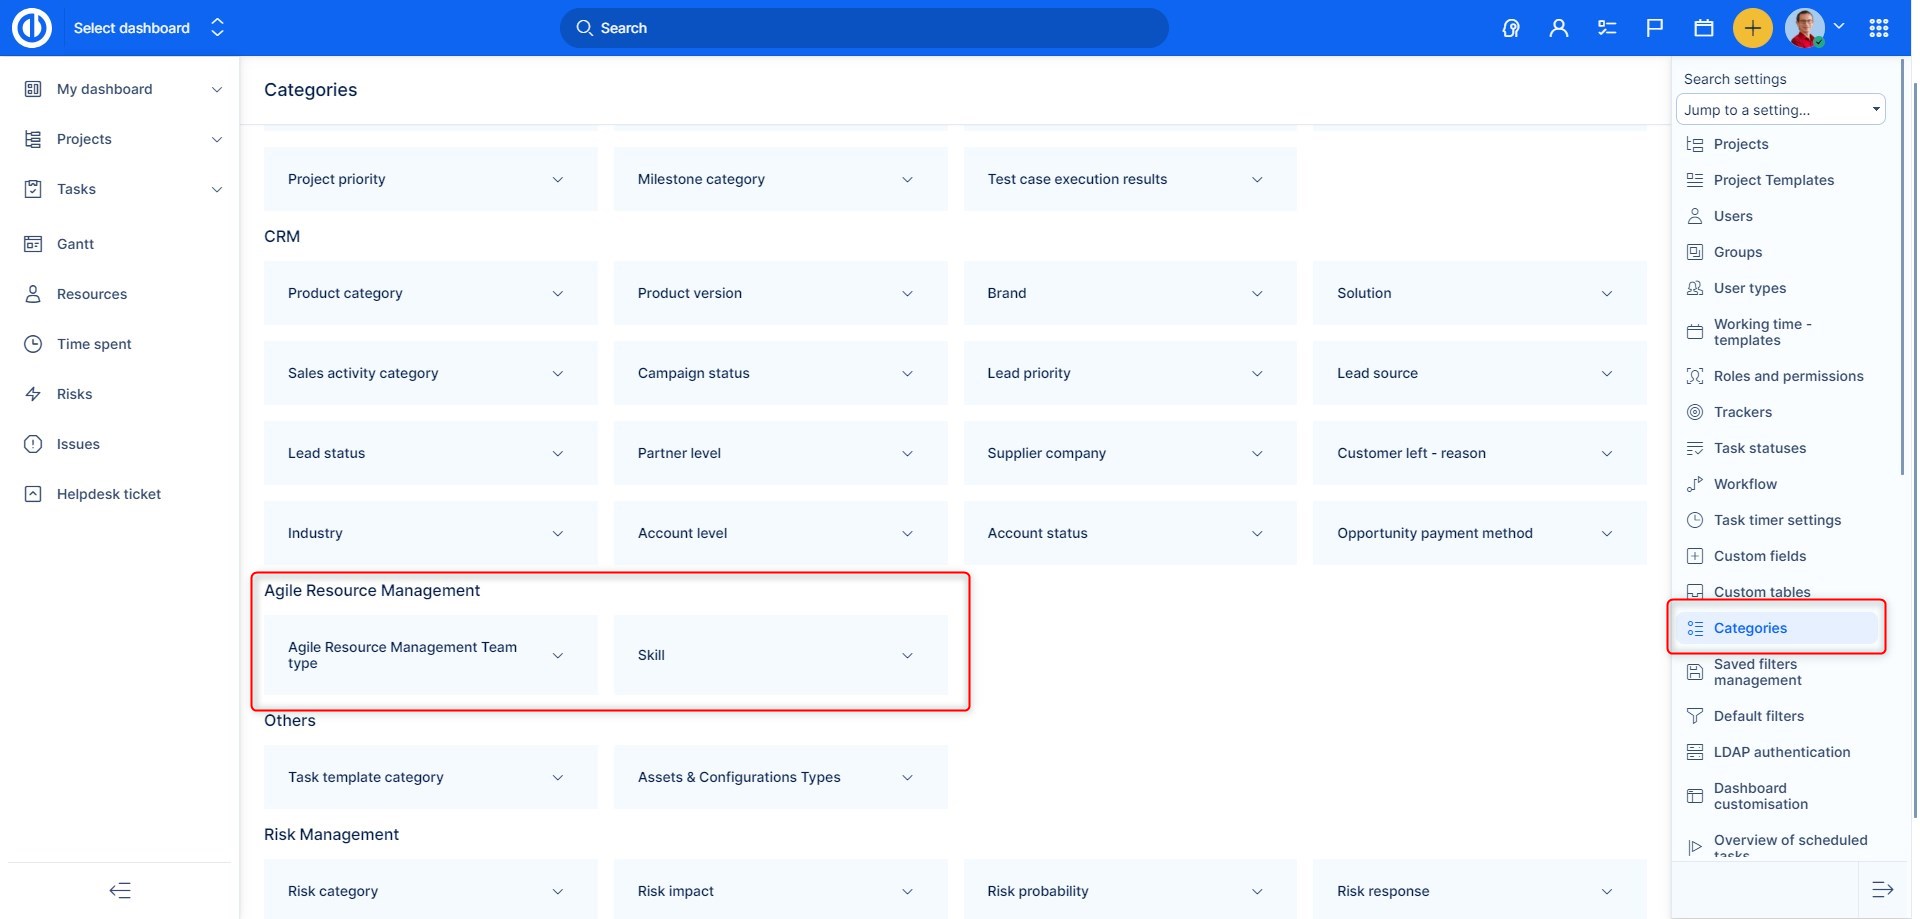
To add a new team or skill to Agile Resource Management, navigate to Administration >> Categories >> Agile Resources where you find both options in one place. Of course, besides adding new teams and skills, you can also edit or remove existing ones.
Roles and permissions
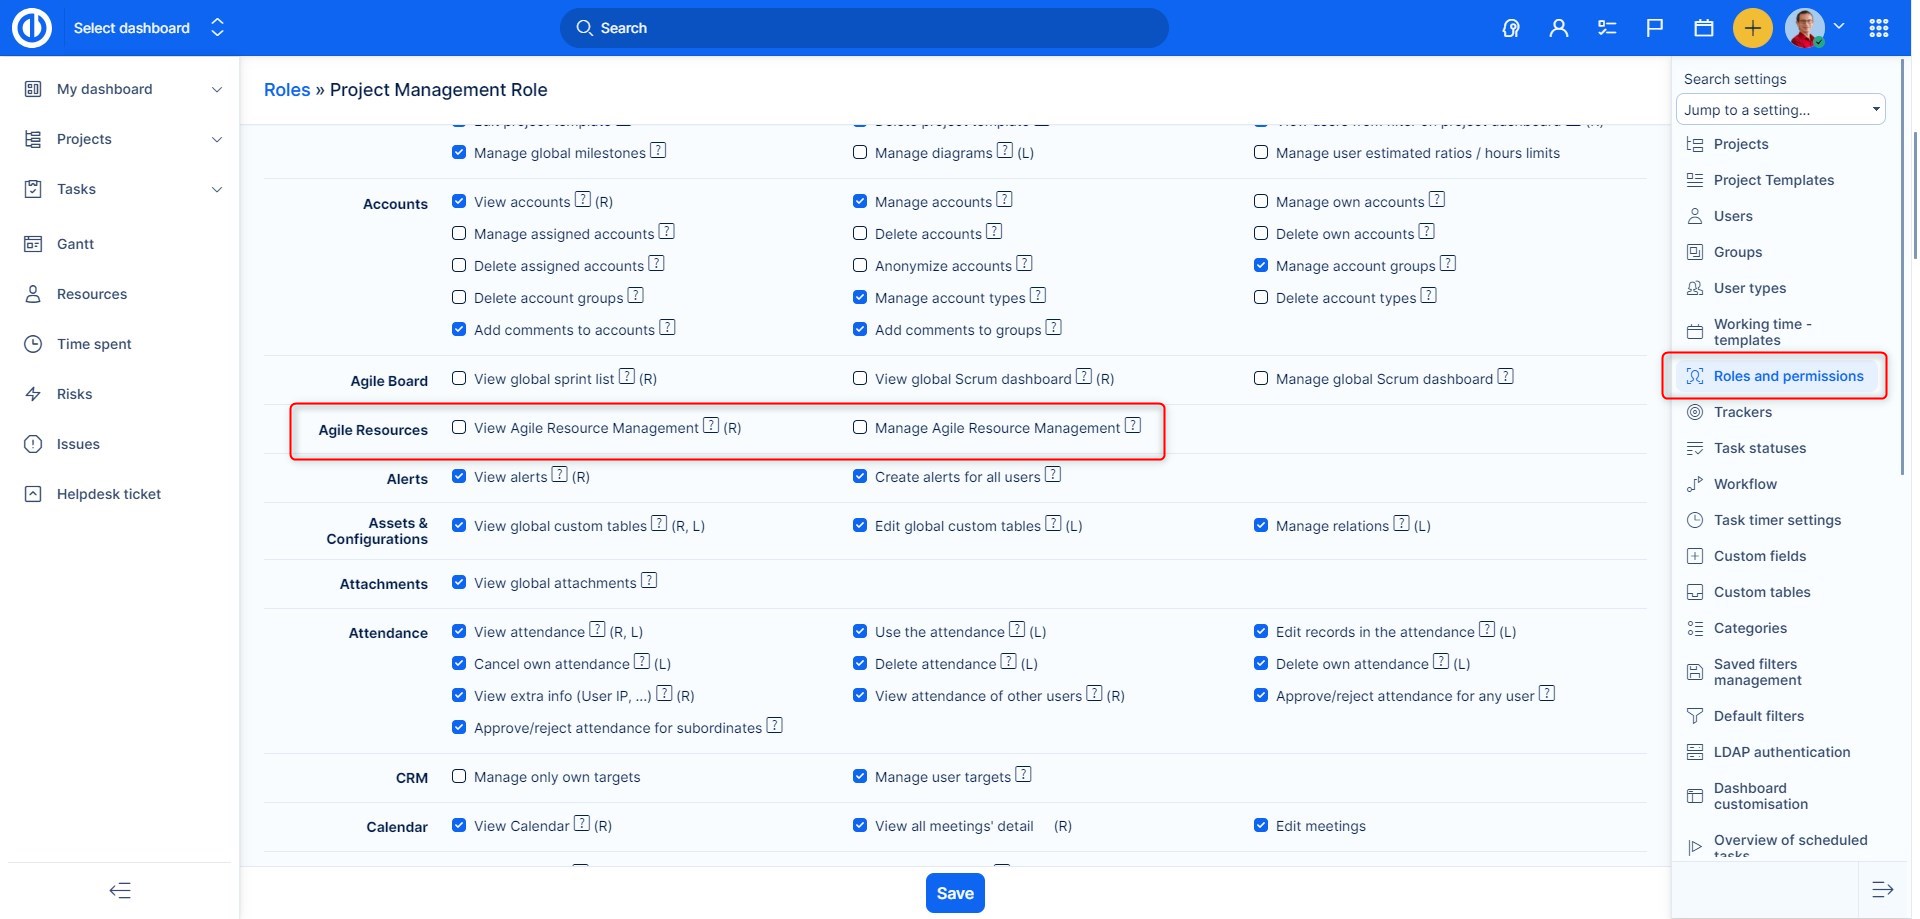
We should not forget to set user permissions, in Administration >> Roles and permissions >> select a role >> Global permissions >> Agile Resources. Here you simply check whether the relevant user role has the right to view Agile Resource Management and whether it can manage it (i.e. make changes to it).
