Automations
Introduction
Automation modes
Permissions and visibility
How to set up
Logging
Replacing Easy buttons
Introduction
This feature is available from version 15.
What are Automations
In context of Easy Project it is a set of functionality that significantly decreases manual user actions required to control our application. Use cases range from editing multiple task attributes by just one click; creating a customized data extraction from a list of time spent; automatically reassign tasks from person on vacation to their substitute.
Automation modes (types)
There are various ways how automations are performed and triggered:
- Entity button
- List button
- Workflow button
- Time based rule
Entity button
How it works
Video tutorial available here.
A button is shown on the detail of an entity, e.g. a task. User clicks on it, and it performs pre-defined actions, such as:
- Edit attributes - e.g. raise priority, reassign task back to the submitter, extend due date by 3 days, set % done, remove value of a custom field
- Add a comment
- Create a new task from template - related to the existing task, a subtask, or completely independent task
- Send webhook - trigger an external application to perform certain actions related to this task and return back useful information. For example, generate an excel sheet from data contained within the task.
Use case examples
Work approvals, standardized escalation, conditional follow ups, transfer task to a formal document, enrich task by information from external resources, one-click asorting of ticket pool.

List button
How it works
Shown on a list of the selected entity. By clicking, a POST webhook is called and sends a payload containing IDs of all listed entities + basic information about the user who clicked it.
Use case examples
Fully customized exports, running AI data analysis, expanded reports with data from external systems.

Workflow button on dashboard
How it works
Available on any dashboard. Clicking it will trigger a POST webhook, or open an n8n input form.
Use case examples
Ad-hoc information request from Easy Project or any external system, or their combination.

Time based rule
How it works
Action on tasks with defined attributes, triggered automatically in configured time period.
Use case examples
Automatic data discrepancy repair, automatic escalations, advanced customer notifications, reassigning tasks from absent colleague to a deputy.
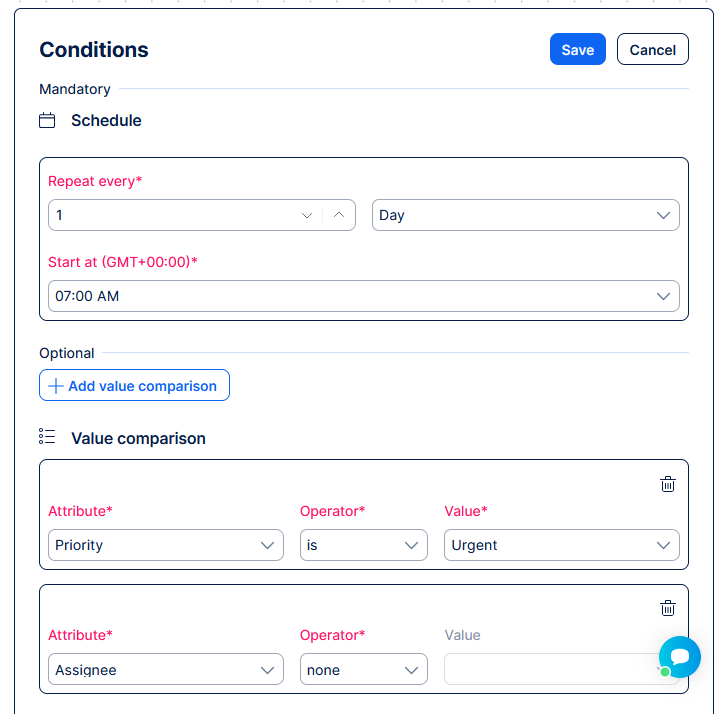
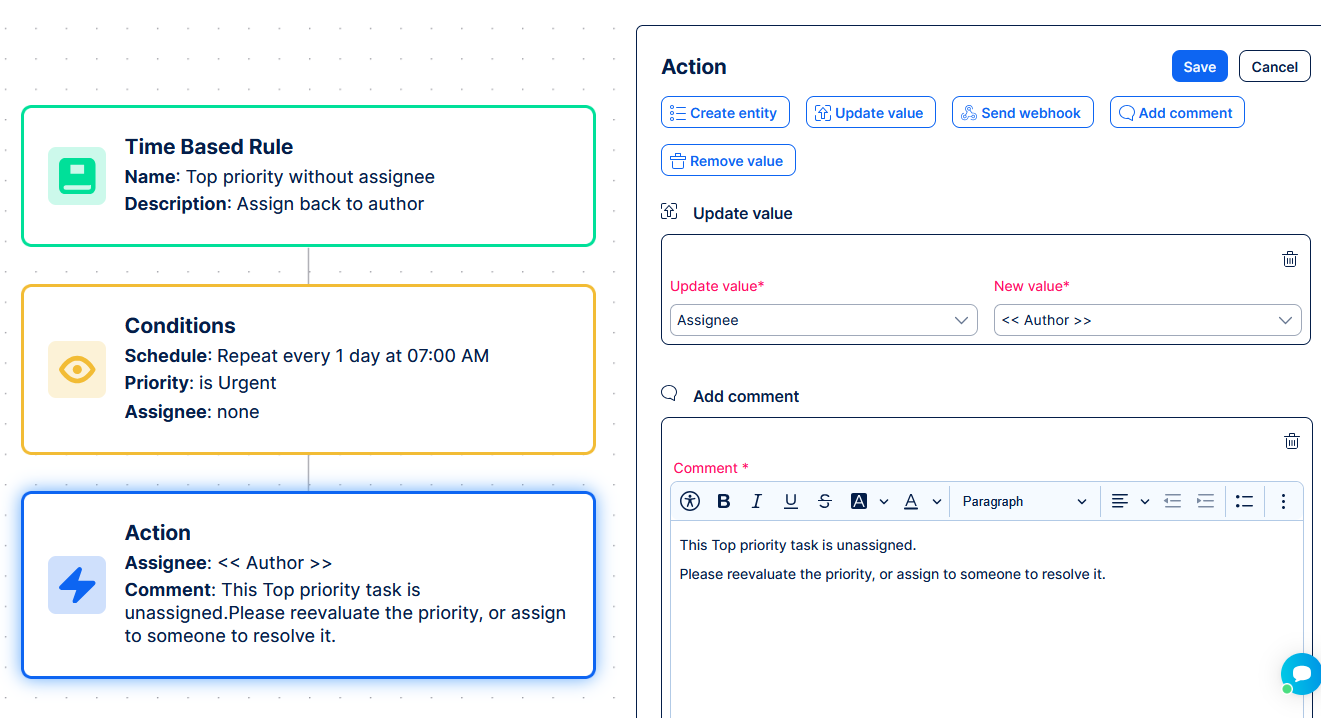
Let's take a more detailed example to better explain the behavior.
- Every morning at 7 am.
- Check all tasks with certain attributes
- Top priority
- Without an assignee
- Assign each of these tasks back to the Author
- Write to comment: This Top priority task is unassigned, please reevaluate the priority, or assign to someone to resolve it.
Permissions and visibility
Only administrators and users with necessary permissions can view and work with automations.

In addition, particular automations may be restricted to only selected roles. Automations marked as private are only available for their creator.
How to set up automations
In the global menu (top right), find Automations.
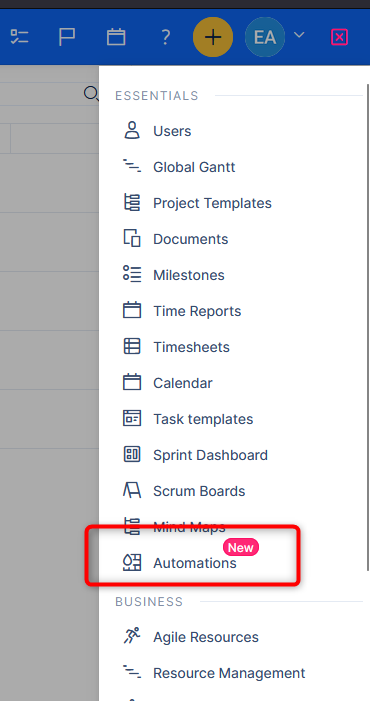
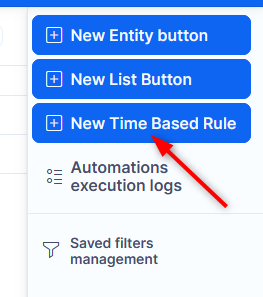
You will find a list of existing automations. More importantly, there are buttons to create new automations.
Each of the automation modes have some specifics, but generally their configuration consists of
- Appearance - general identification by name, color, and possibly icon
- Conditions to show or run - who can see it, where it is visible, or when is it triggered
- Action - what it actually executes
Example configuration of time based rule
Example of list button configuration

When you have the automation configured, don't forget to activate it. Deactivation is useful to hide existing automations, for which you don't want to lose their setup. Or simply if you haven't finished configuring a new automation.
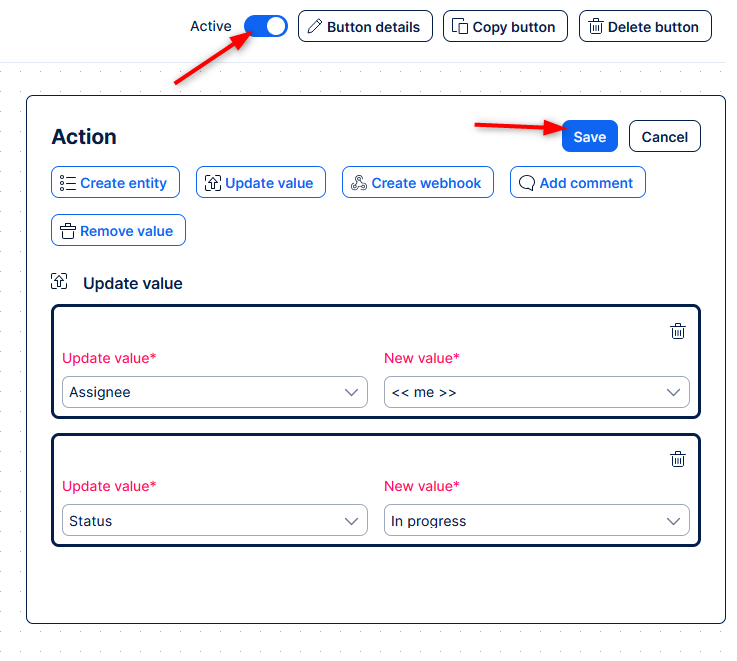
⚠️ Double-check the configuration before activating ⚠️
Before activating an automation, verify once more that you fully realize the reach and scale of your automation. Here are some situations you should consider:
- Time based rules - make sure the conditions to run are properly specified and as narrow as possible. We recommend checking how many items satisfy the filters defined in the conditions. A safe threshold is for each time based rule to affect a maximum of 100 items.
- Time based rules - spread the time of execution of each rule to different times. This will prevent potential performance issues. Not everything needs to happen at midnight. In fact, no separate automations need to happen at the same time.
- Workflow or permission restrictions - check that the action is allowed to the users who can trigger it (field visibility and editability, status transitions, project memberships)
- Beware of infinite loops - most relevant for time based rules, but not limited to them. Do not let your automations battle between changing the same task from New to Done and from Done to New.
Generally we recommend a quality control of new automations in context of other before activating them. Allow management of automations only to properly trained persons, who fully understand the potential issues stemming from incorrect setup.
Setting up Workflow button on dashboard
This specific automation is configured ad-hoc on the dashboard where you want to use it.

Actions log
Actions performed on entities with history (e.g. tasks) will save the journal as the user who triggered it. Same as like any other manual action on that entity.
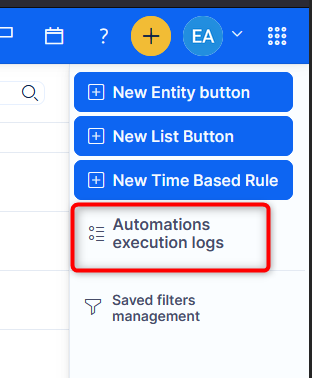
Moreover, you will find the Automations execution logs in a dedicated list. You can reach from the list of automations.
Replacement of Easy buttons and migration
Automations, Entity buttons in particular, will ultimately replace Easy buttons (Action buttons). This change will bring more powerful automation capabilities to Easy users.
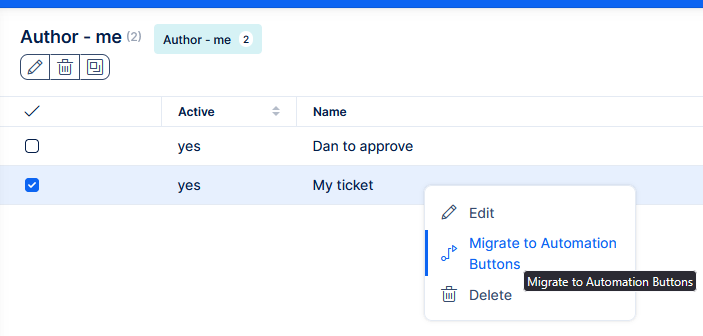
Migrating from Easy buttons to Automations is quite simple.
- Go the list of Easy buttons (Global menu >> Easy buttons)
- Right click on a specific Easy button
- Click Migrate
- This will create an automation (entity button) with the same visibility conditions and actions as the Easy button.
In case of issues with migrating, please check your permissions and button settings.