GDPR features
Table of contents
Introduction
Contact and user anonymization
Password policy
Two-factor authentication
Special visibility for custom fields and contacts
Request and download logs
Session expiration
Contacts visibility
Introduction
Easy Software takes personal data protection seriously. European regulation known as general Data Protection Regulation (GDPR) brings a number of challenges to all organizations and became one of the most resonated business topics. Our mission is to provide Easy Project clients and basically all Project community with a reliable software which allows fulfilling all duties of Data Processors efficiently. Easy Project is 100% GDPR-ready from version 1.2 (May 2018).
Account and user anonymization
Account and user anonymization feature allows you to quickly hide/erase sensitive data stored in selected custom fields in any type of Account (personal, company, account) and Users. Neither the account/user nor any custom field is removed after activating this feature, just their data content become empty without the possibility of recovering original data any later. When a custom field is set as "Required", i.e. its content cannot be empty such as name, surname or e-mail address, the original data are automatically replaced with text string "Anonymized" (for a company/account ) or "Anonymized account" (for a personal account) or "Anonymized User" (for a user profile). The purpose of the feature is to satisfy possible clients' requirements to hide/erase their sensitive personal data as imposed by GDPR. The legislative says that you do not have to delete the data as you need them for understanding your customers in general. But such data cannot be linked with a particular person.
How to use the feature
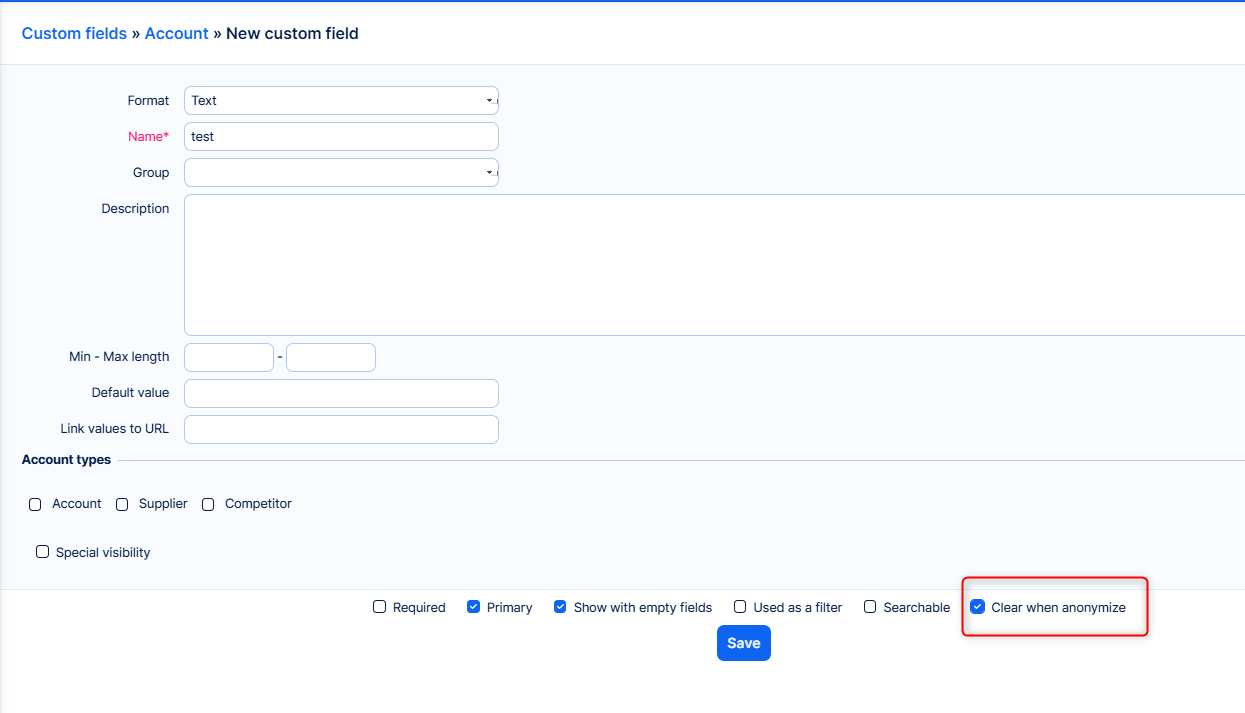
First of all, you need to select which custom fields in Accounts and Users are considered sensitive and will undergo the anonymization process should your client ask for it. This is be done pretty easily in Global menu >> Administration >> Custom fields >> select category "Accounts" or "Users" >> edit a sensitive custom field. A checkbox called "Clear when anonymize" can be found in the bottom settings. When you tick the checkbox and save the settings, all data contents of this particular custom field will be erased immediately on those accounts/users that you later select for anonymization. Therefore, use the feature with caution to prevent unnecessary data loss.
Accounts:
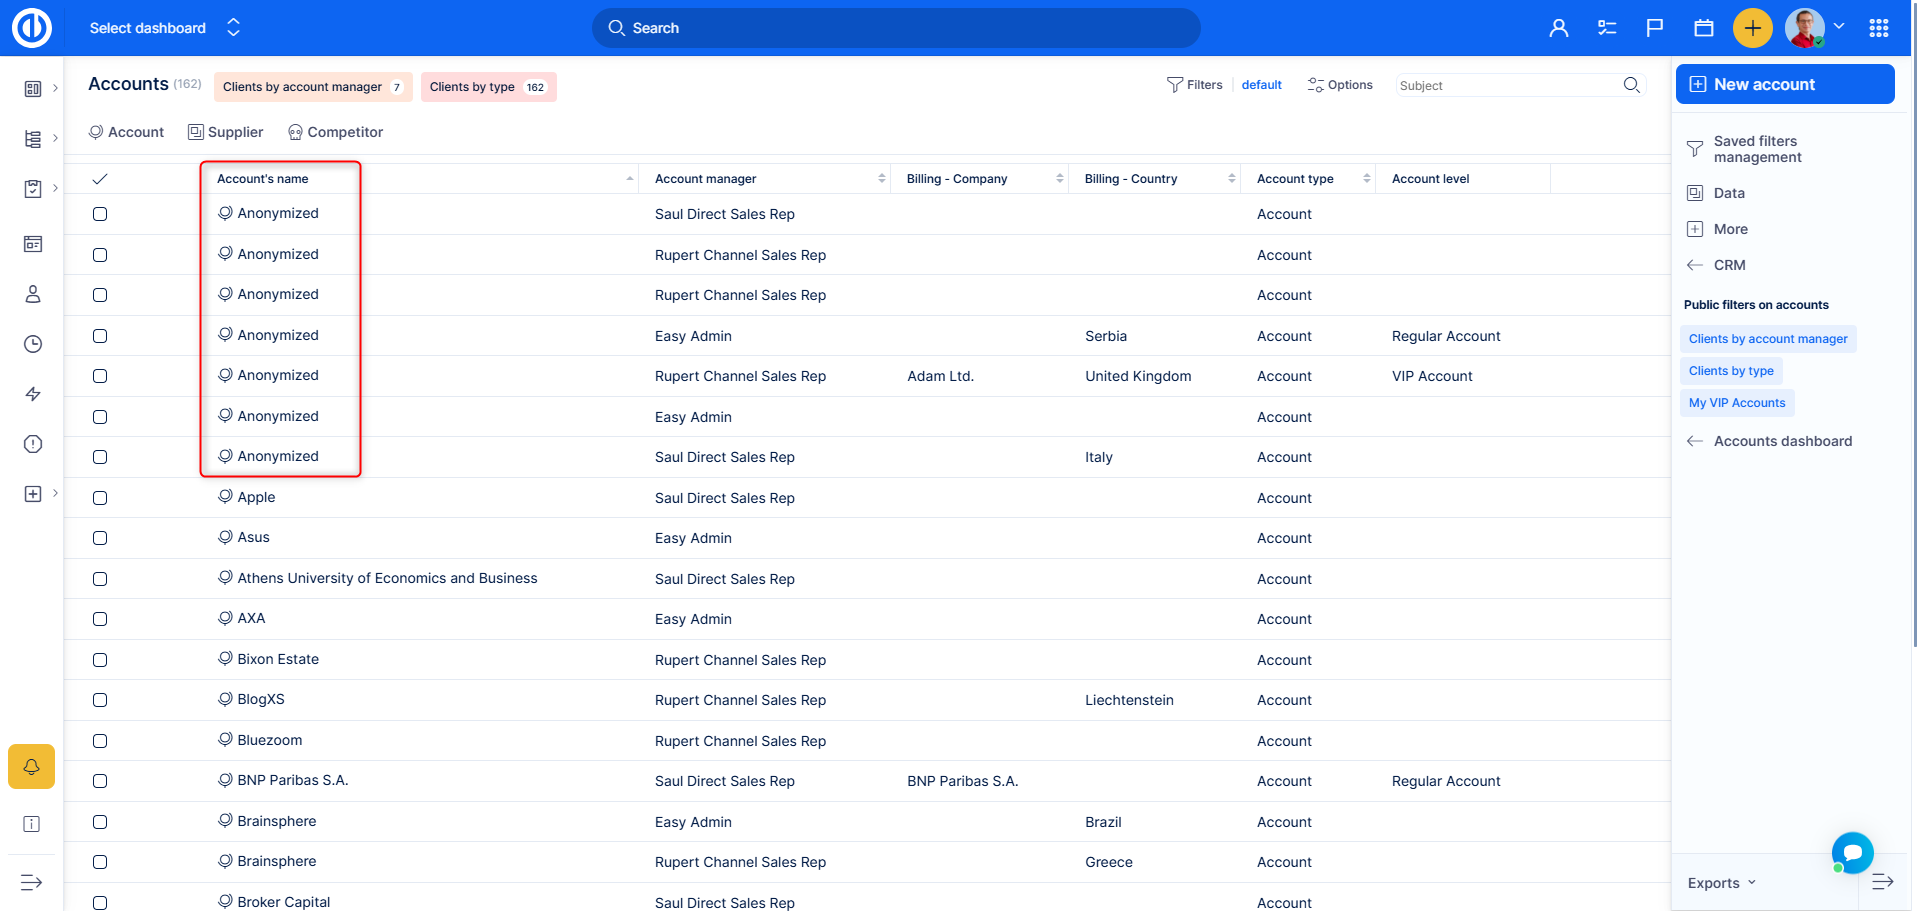
This is how it looks like when the field "Account´s name" has been considered sensitive and selected accounts were anonymized. On the other hand, "address" field was not set to anonymize, therefore, it's visible.
Anonymized account can be recognized not just from accounts list but everywhere else too, such as in Sales activities.
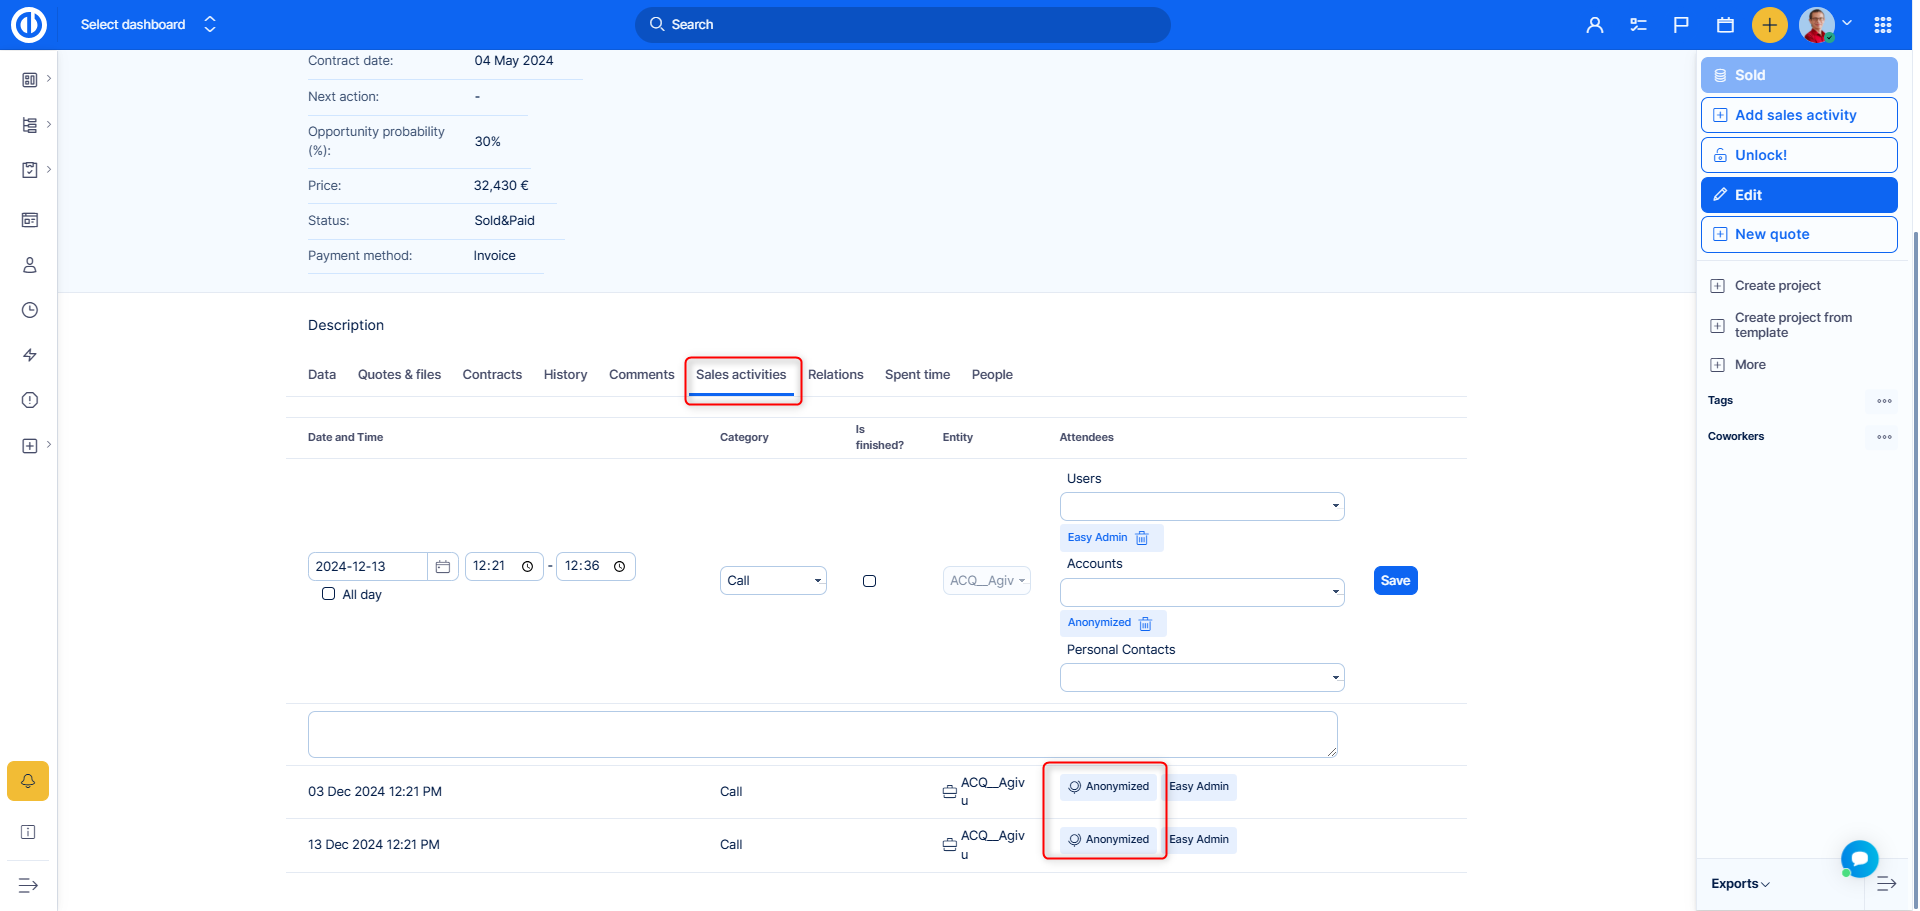
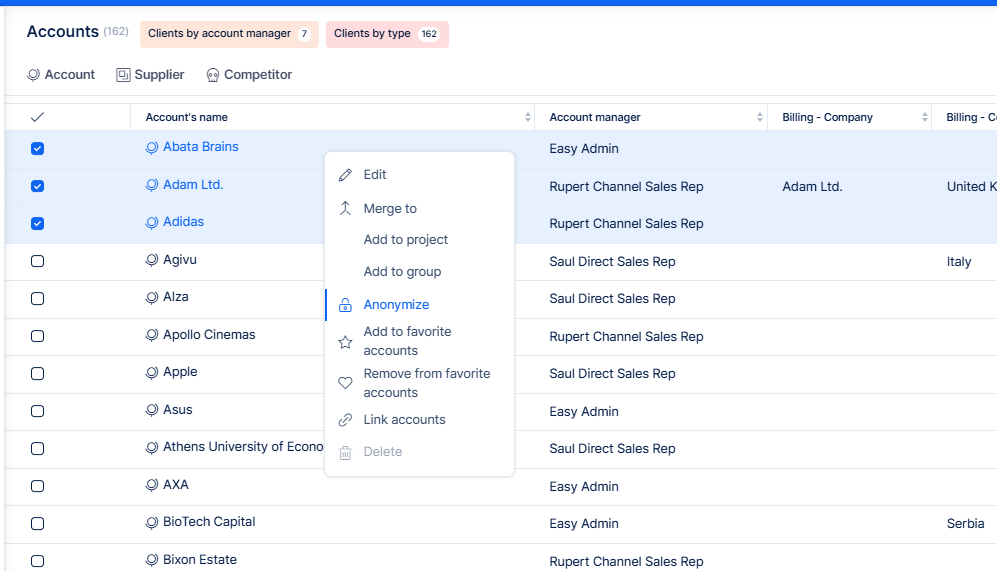
In order to anonymize one account or even more accounts in bulk, just select them from the list and click right mouse button to open context menu. Here you just select "Anonymize" option and confirm the assurance dialogue by clicking "OK".
Users:
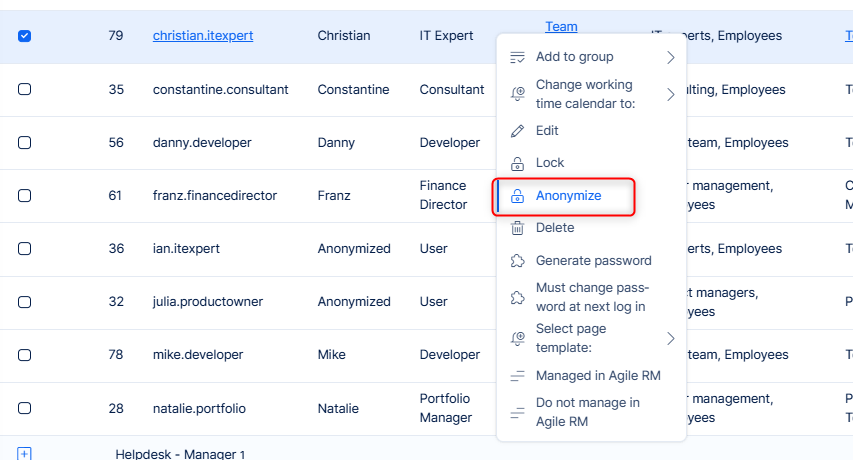
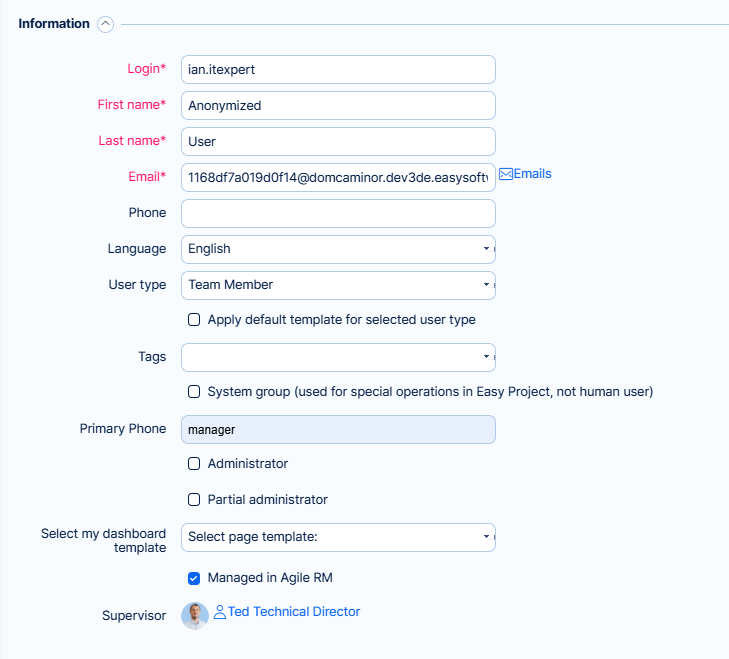
In addition to Accounts , also Users can be anonymized by repeating the same procedure with right-click button.
Also, you can anonymize user by clicking the particular button in the sidebar of user profile.
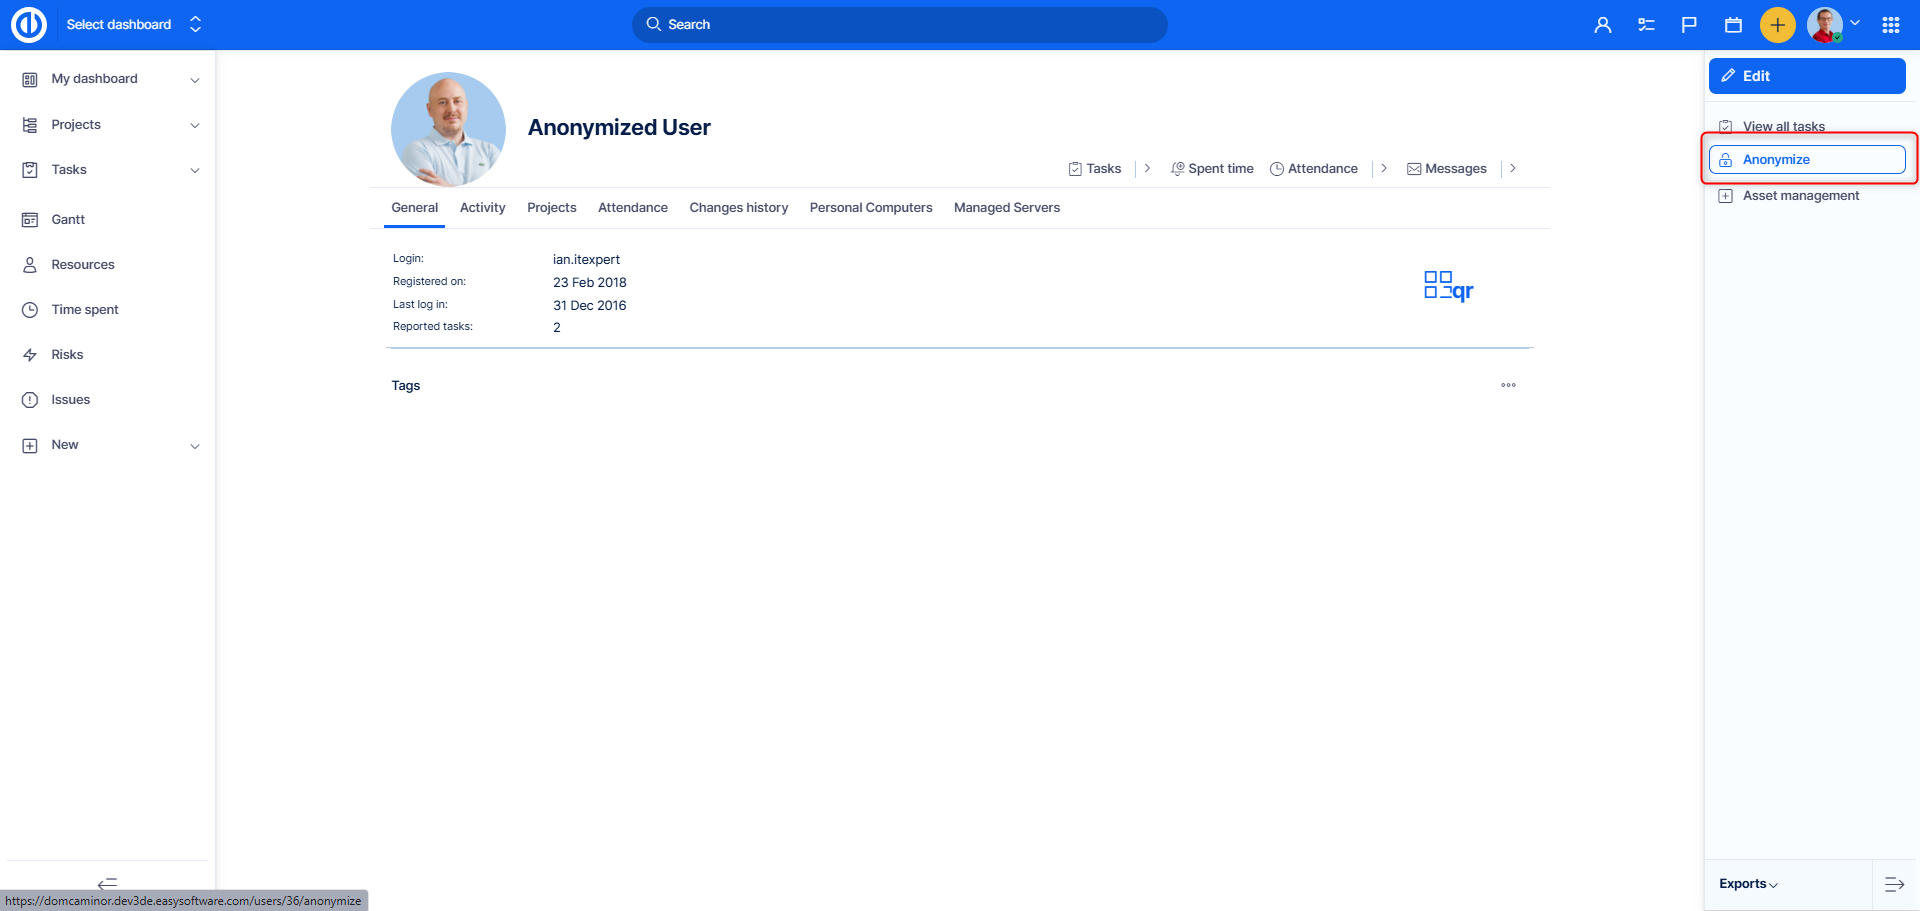
This is detail of an anonymized user profile. Take notice that for user profiles with anonymized e-mail address, a new randomly generated e-mail address in the form of "...@url-of-your-application" replaces the original one.
Stakeholders:
To anonymize a stakeholder, open the list of stakeholders, select the one you wish to anonymize, and click on their name to open their details.
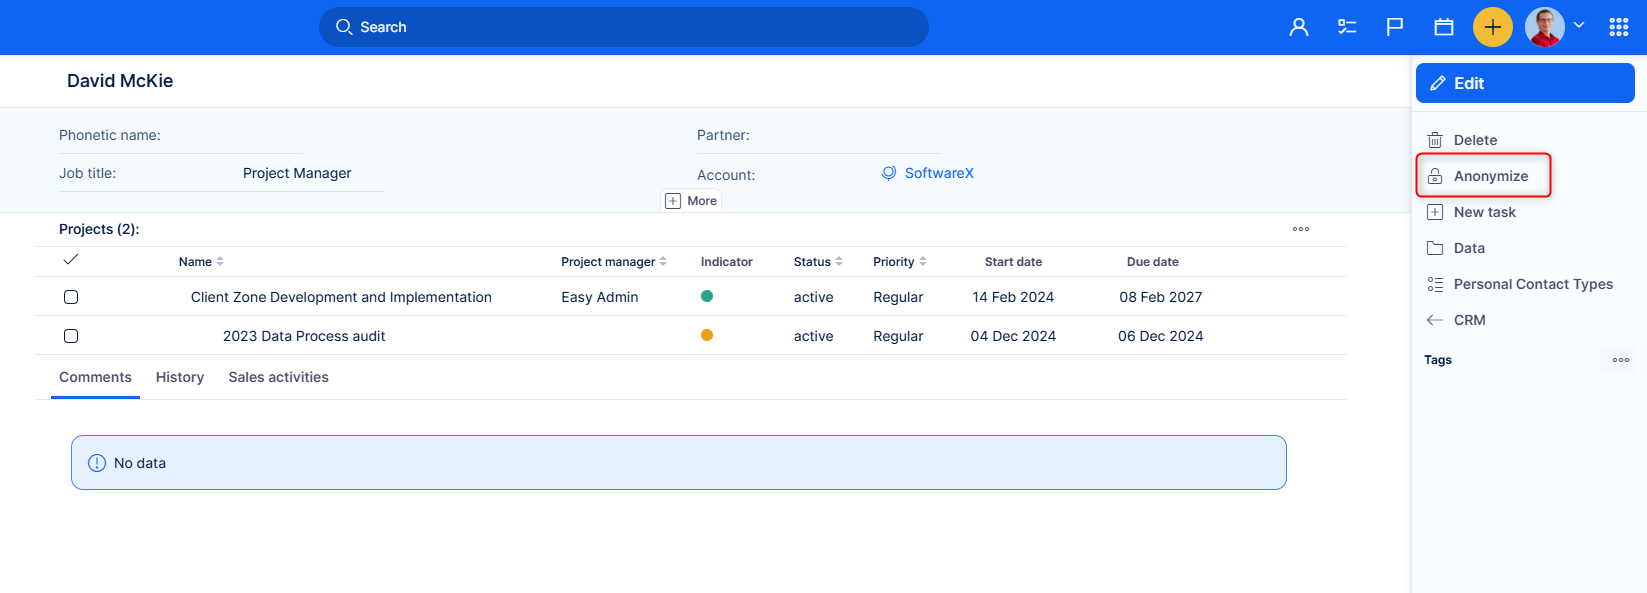
On the right side you will find the Anonymize button.
You will see the change immediately:
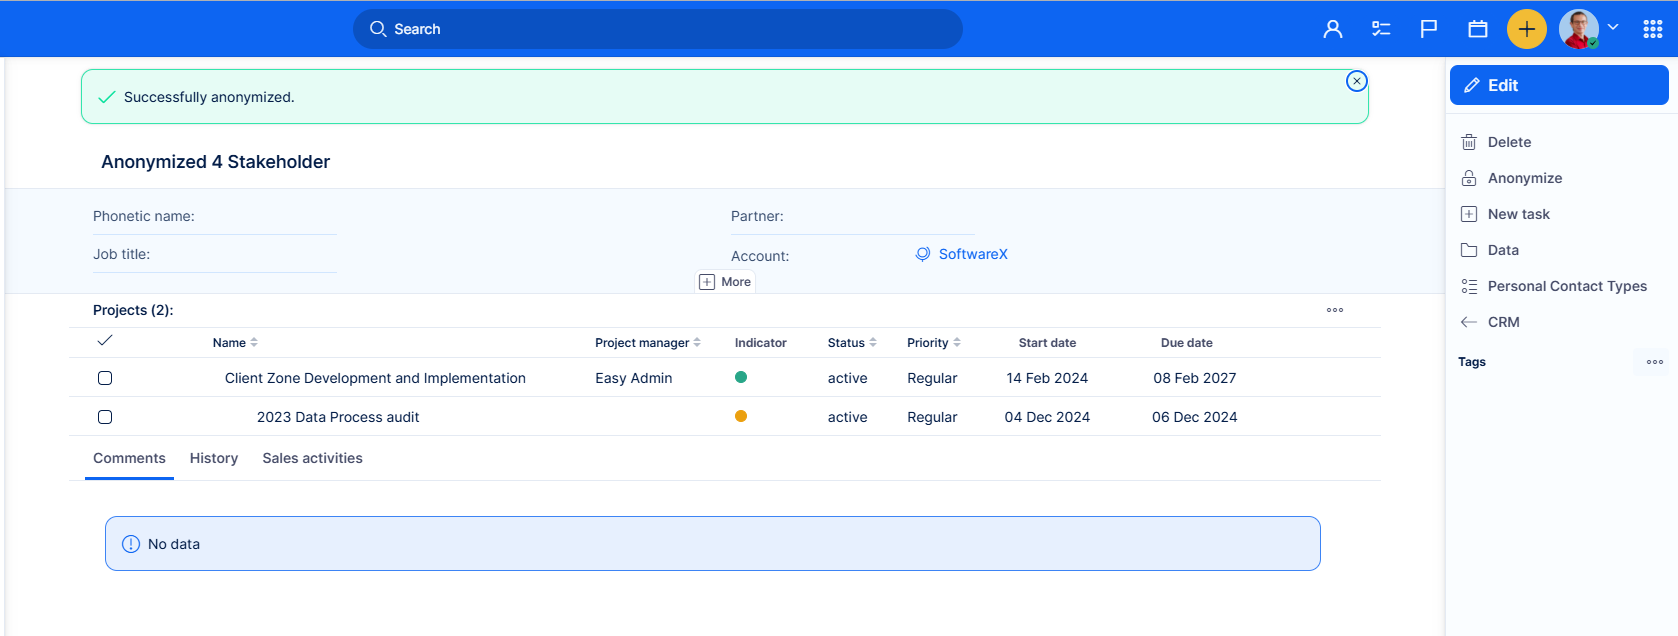
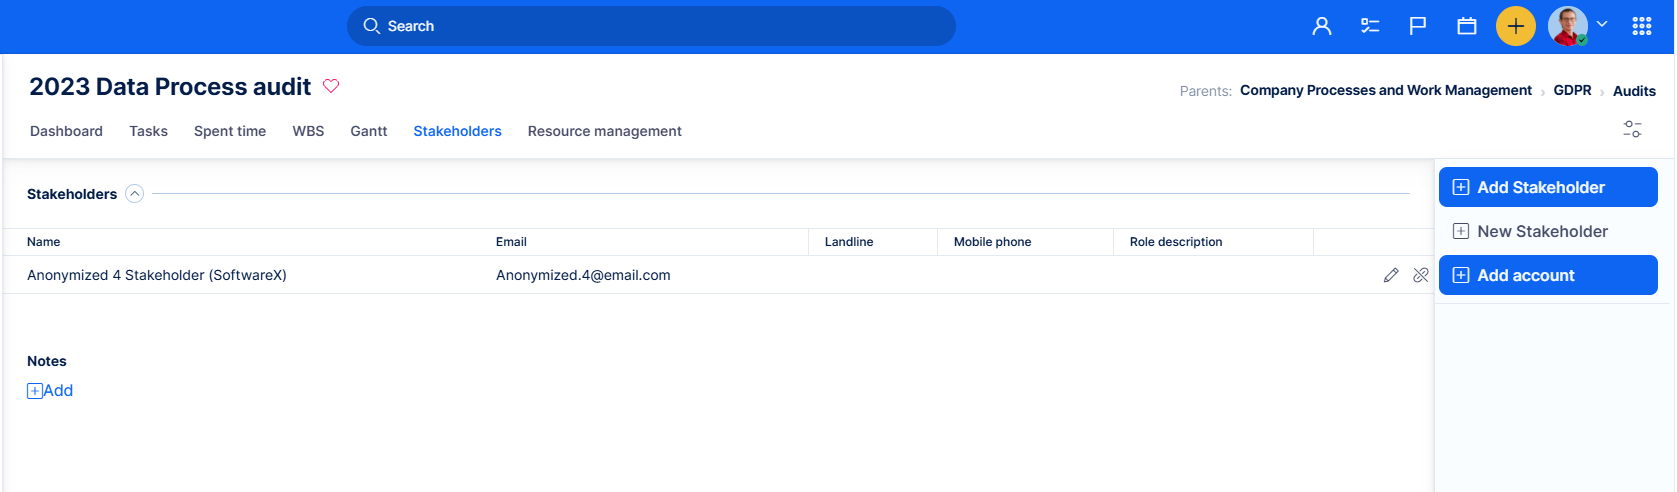
And this is how the anonymized Stakeholder will appear on the project:
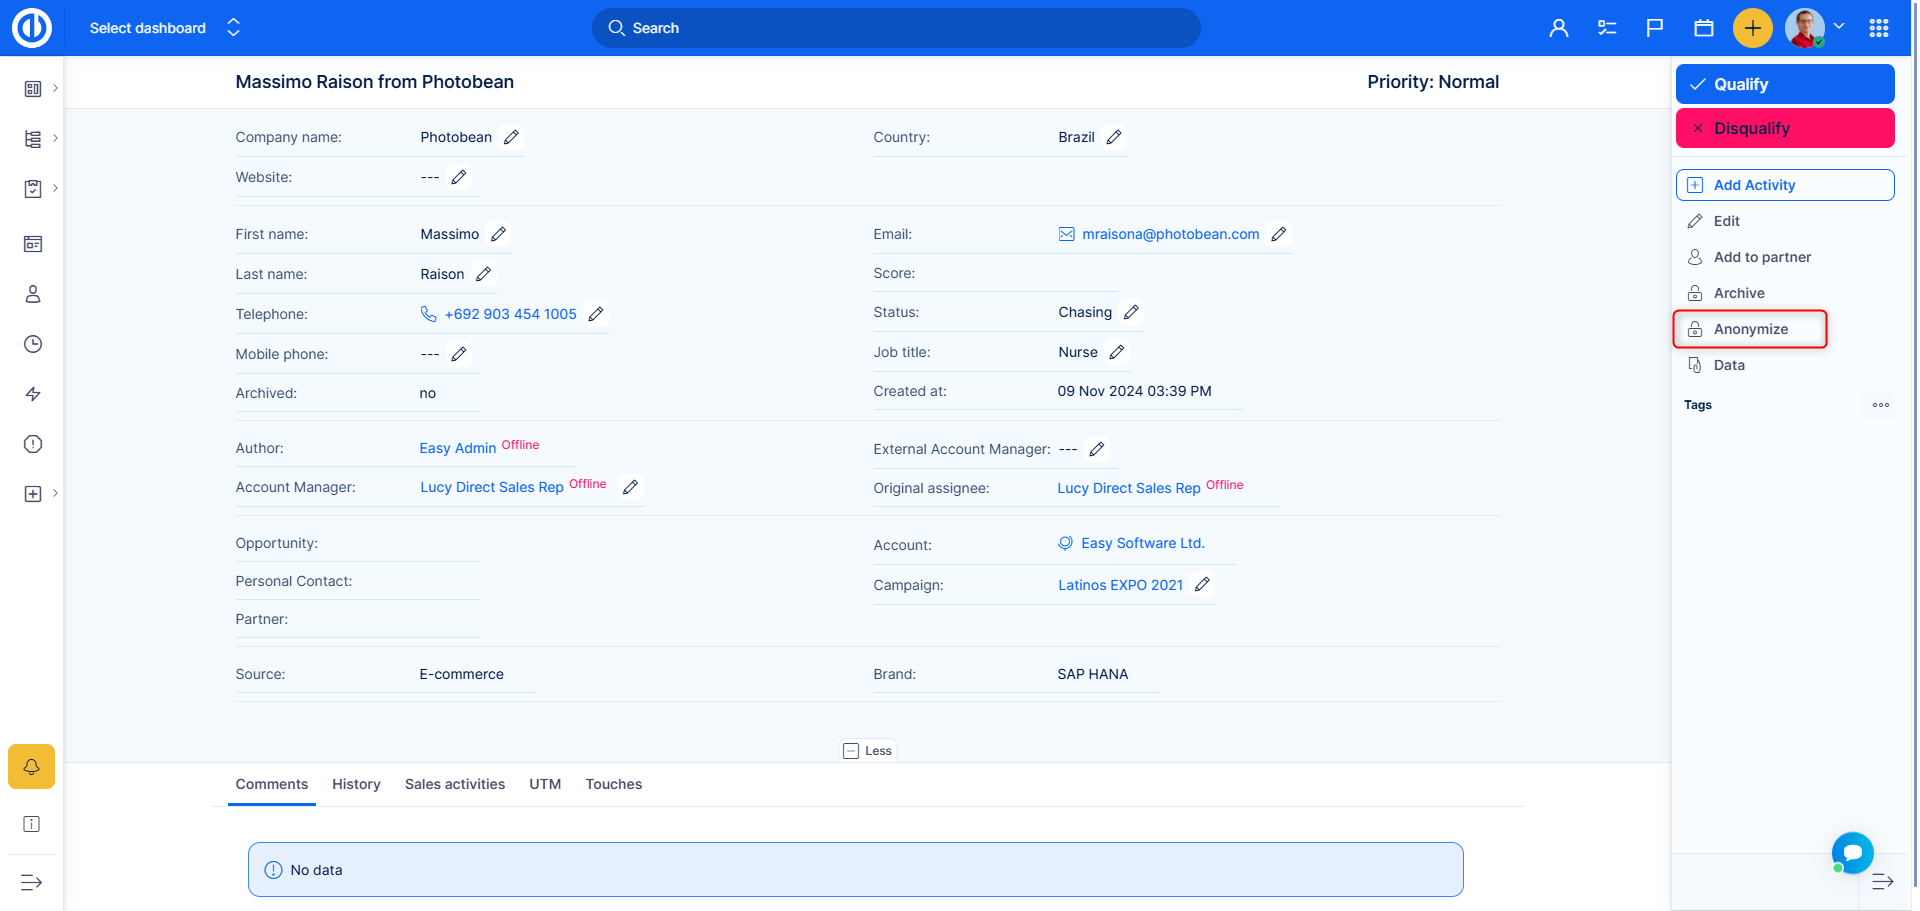
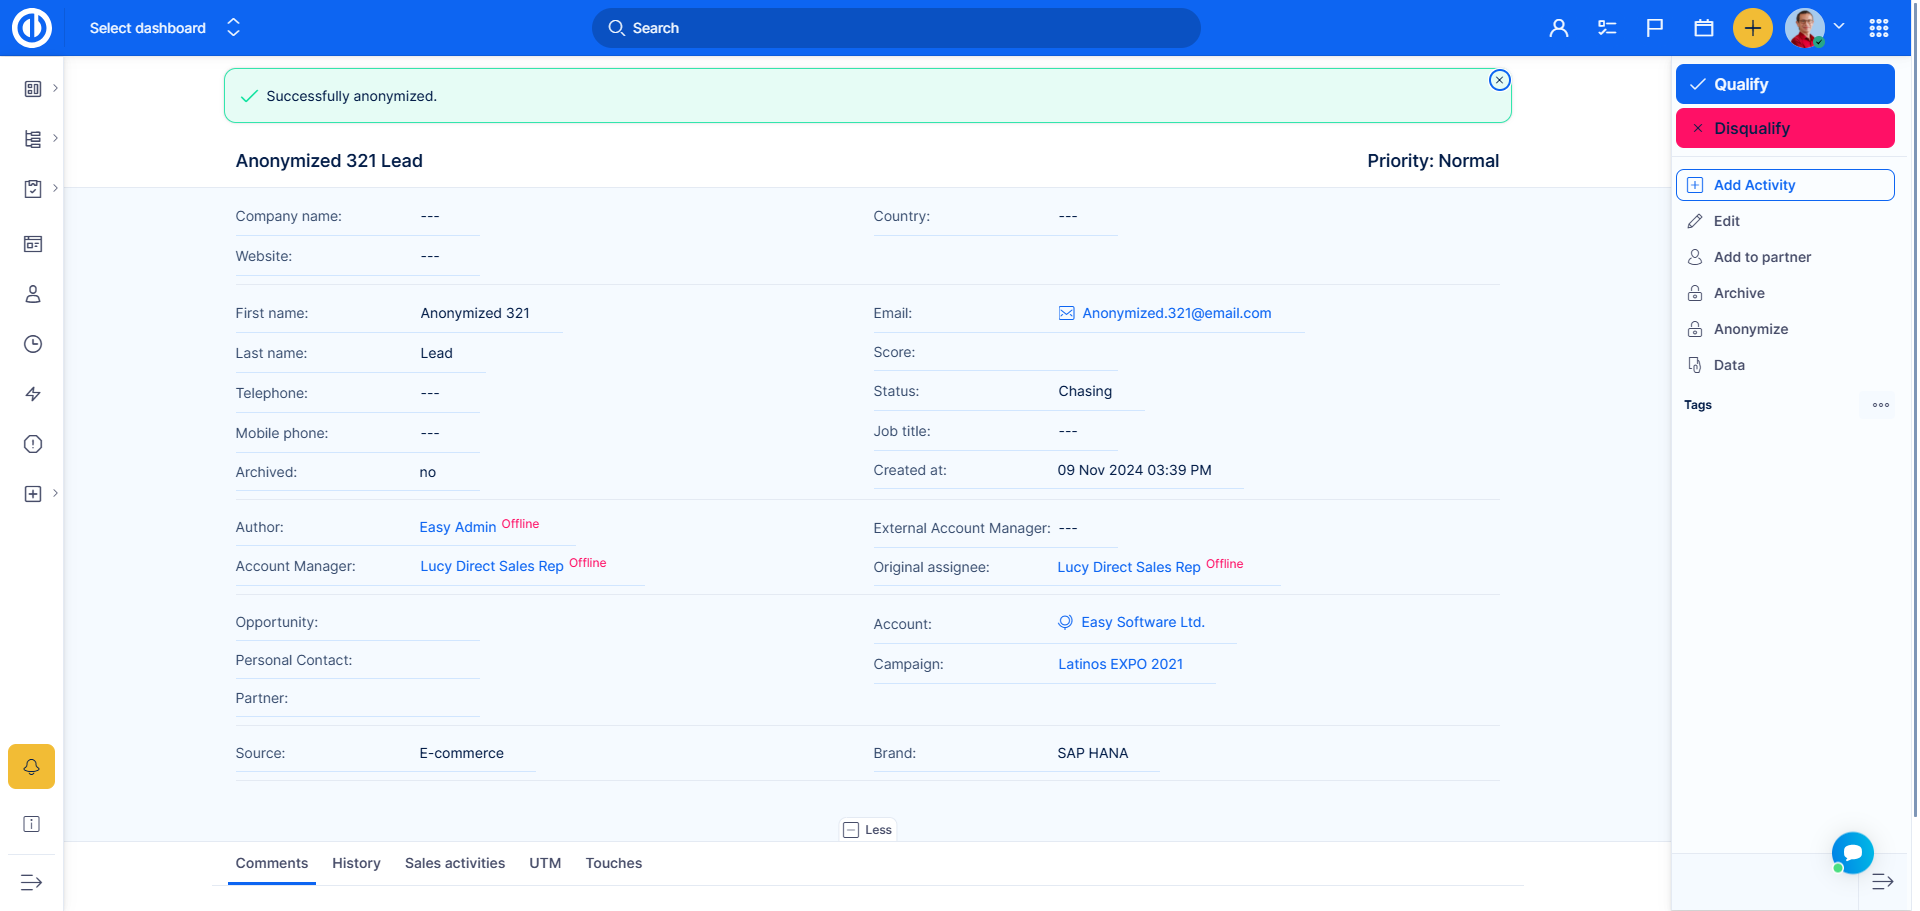
Leads:
Same options can be found on Leads:
Password policy
See the authentication settings.
Two-factor authentication
See the authentication settings.
Special visibility for custom fields and Accounts
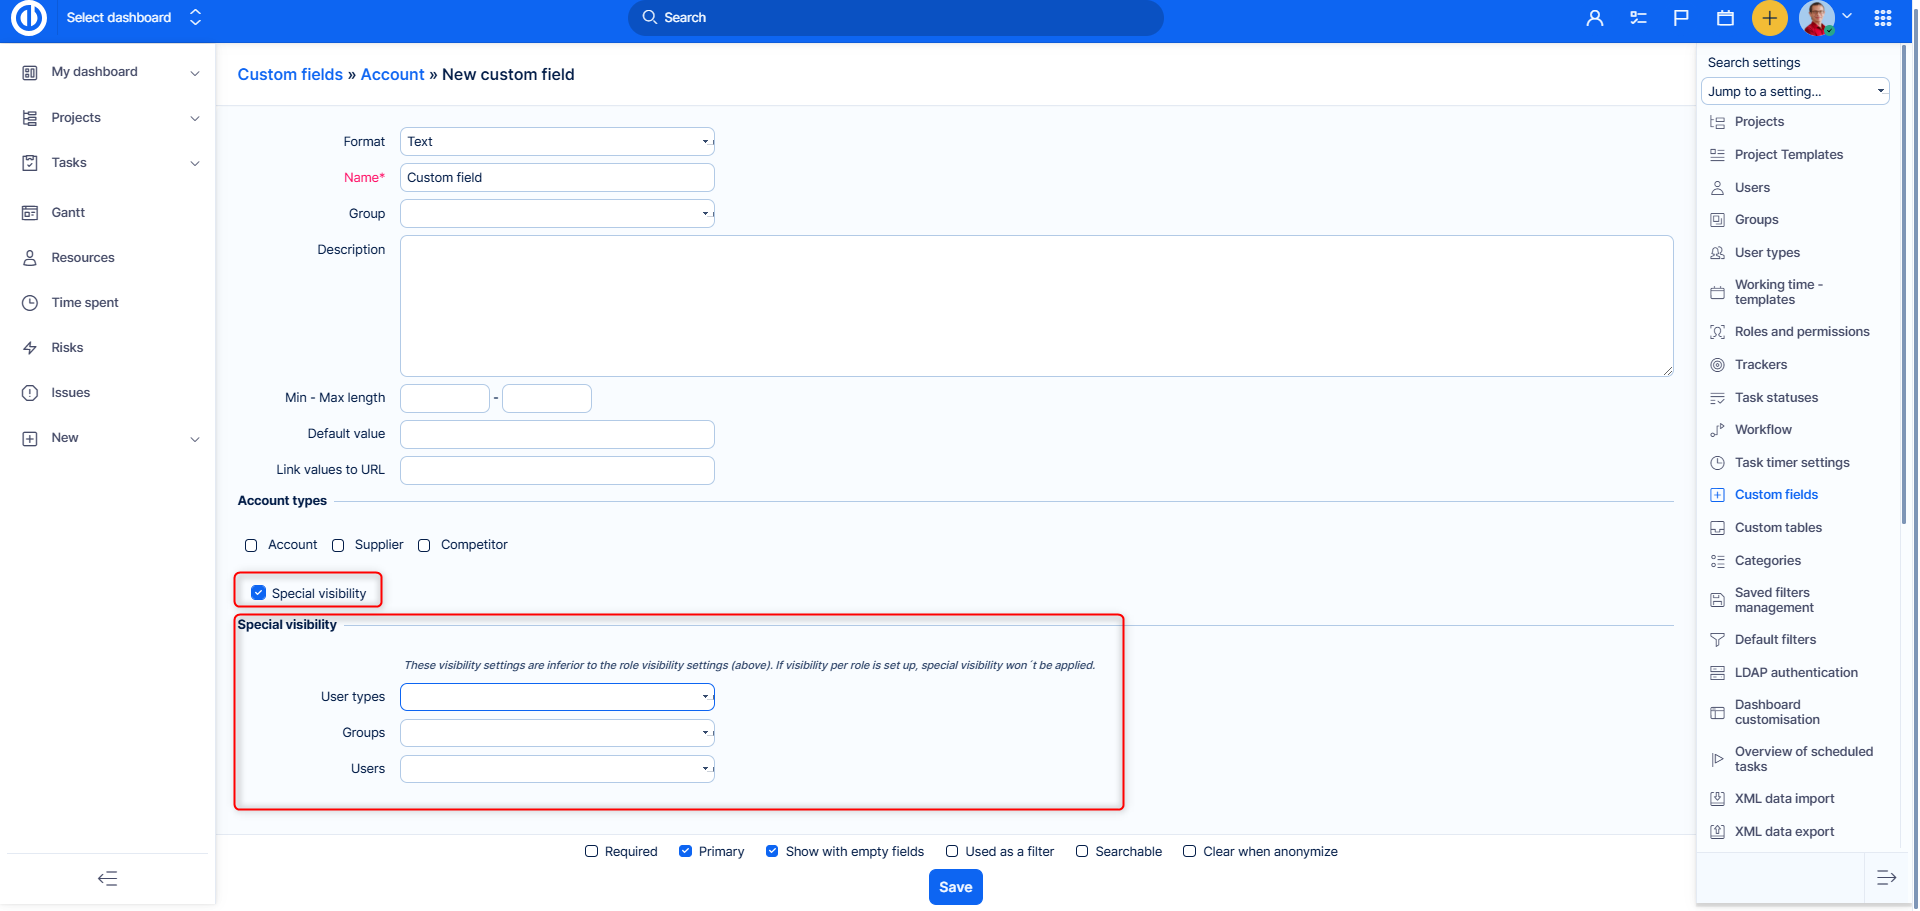
These settings enable configuration of visibility of custom fields and default account fields for selected users, user types and groups. For custom fields, this setting can be found in Global menu >> Administration >> Custom fields - edit any existing custom field or create a new one. At the bottom of the screen, tick the checkbox "Special visibility" to show related setting options as follows:
User types - select which user types can see this custom field or leave blank to make it visible for all user types
Groups - select which groups can see this custom field or leave blank to make it visible for all groups
Users - select which users can see this custom field or leave blank to make it visible for all users
For Accounts, go to Global menu >> CRM >> Accounts >> More >> Settings >> Fields settings where you can edit the settings of default Account fields, such as Author, Last updated, First name, Last name, etc.

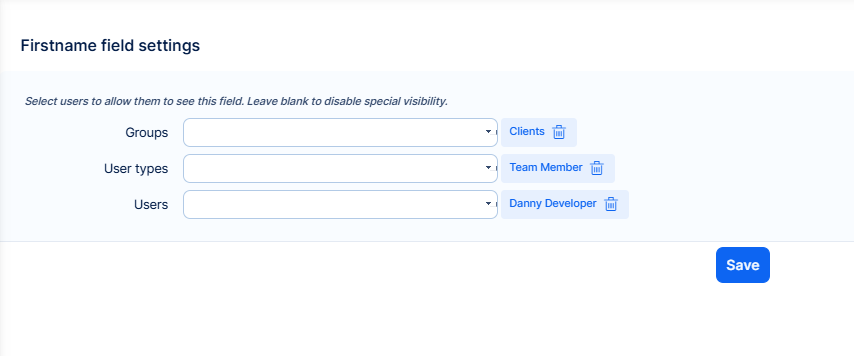
This is an example of Last name field settings. Here you again select the users, user types and groups allowed to see this field or leave blank to make it visible for all. Analogically, only data visible to a user can be exported.
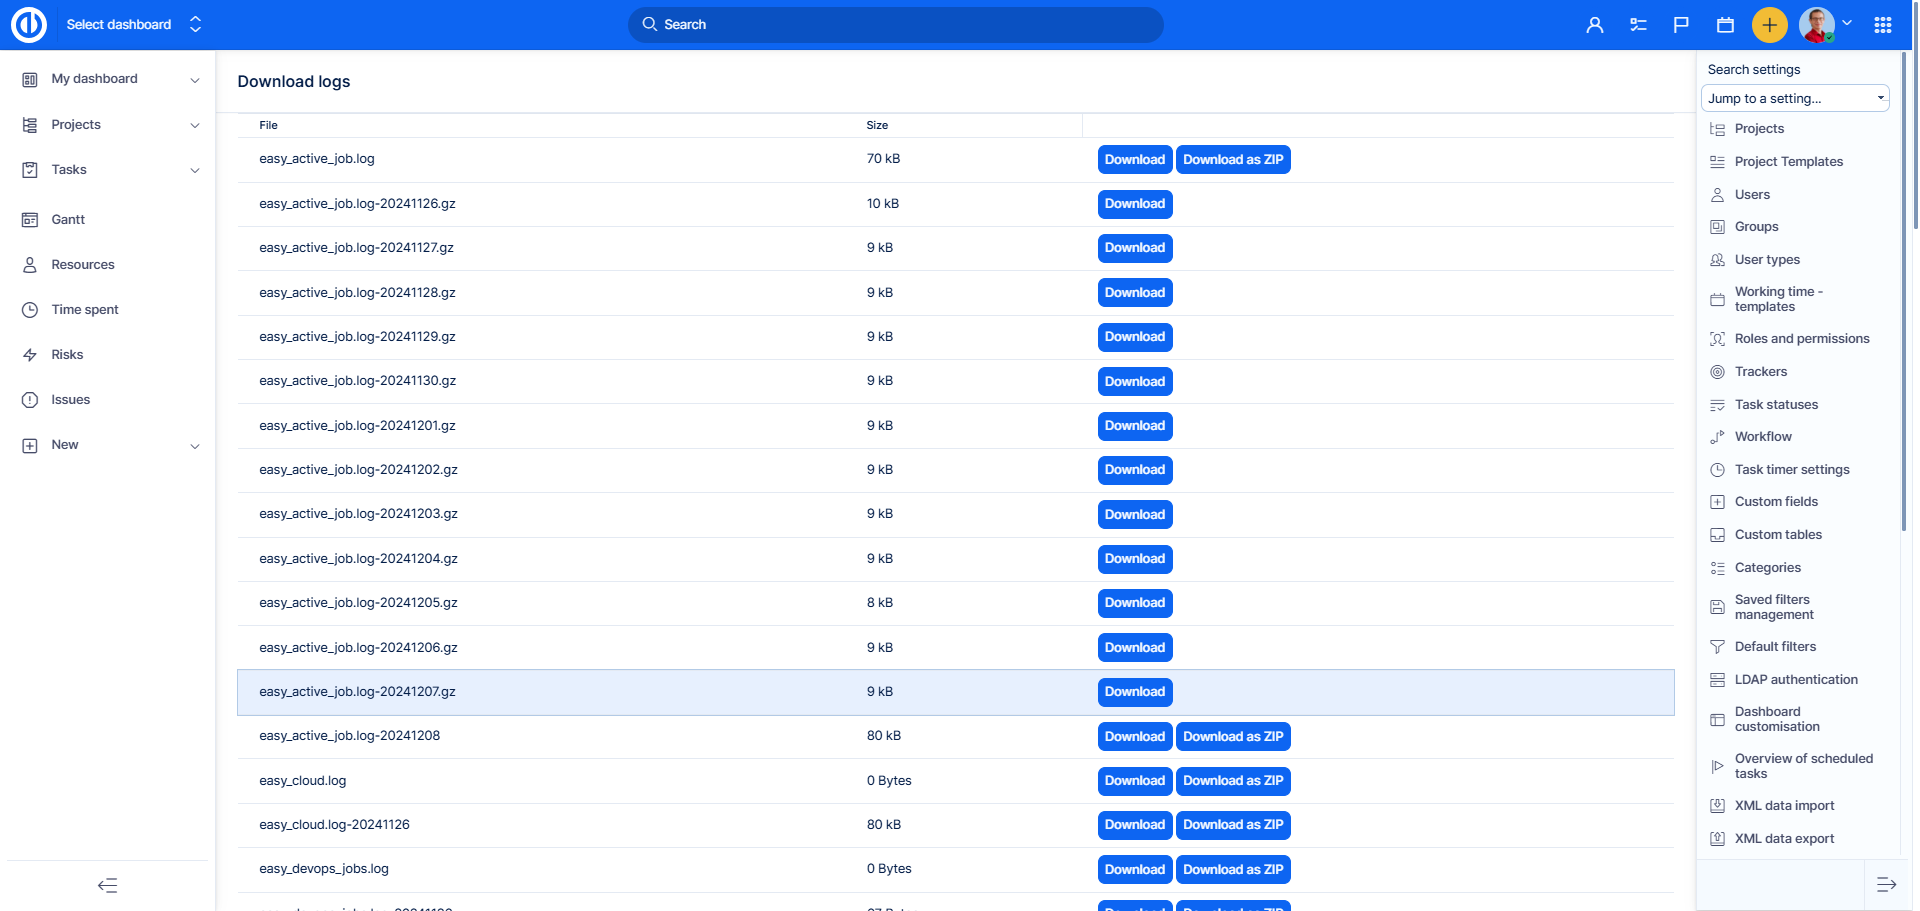
Request and download logs
Go to Global menu >> Administration >> Easy logs, find the required log, and click the Download button next to it.
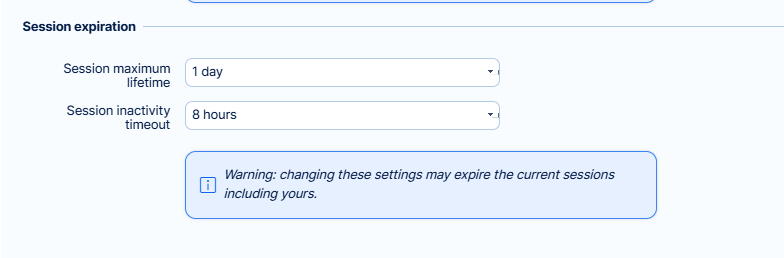
Session expiration
These settings allow to automatically log out a user from his current session after a specified time period. Go to Global menu >> Administration >> Settings >> Authentication - Session expiration where you can find two options:
Session maximum lifetime - the maximum time a user can be logged in a session independently on his activity
Session inactivity timeout - the maximum time a user can be inactive before he is automatically logged out from a session
Accounts and personal contacts visibility
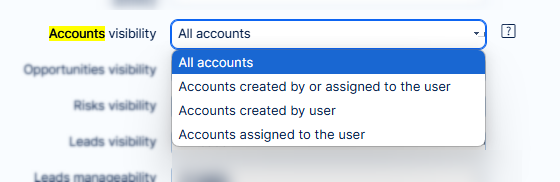
Accounts visibility is set in roles and permissions. Go to Global menu >> Administration >> Roles and permissions - select a role >> Accounts visibility . Each role has the following options: All accounts, Accounts created by or assigned to the user, Accounts created by user, Accounts assigned to the user.
In roles you also need to set, who can anonymize accounts, leads and stakeholders.
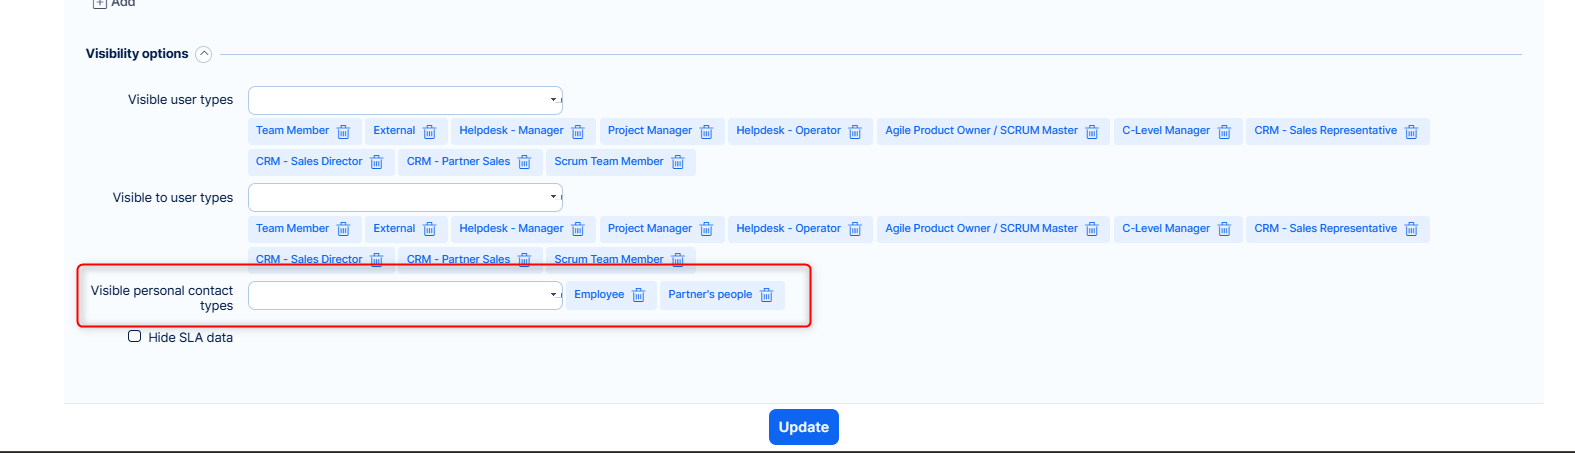
Personal contacts visibility can be configured for user types . To set it up for user types, go to Global menu >> Administration >> User types - select user type >> Visible personal contact types. The selectable options are All, or only specific types.