How to add a new user
Introduction
User creation
User settings
Information
Authentication
Email notification and User signature
Preferences
External calendar
Other settings
How to add a user to a project via User profile
Corner situations
Introduction
Getting started with managing users in EasyProject is simple and straightforward. In this post, we’ll guide you through the process of adding a new user step-by-step, ensuring you’re set up for success. We’ll also dive into the key settings you can configure, giving you full control over roles, permissions, and preferences. Whether you're onboarding a new team member or tailoring their access, this guide will cover everything you need to know.
User creation
A new user can be added in Global menu >> Administration >> Users or simply Global menu >> Users. Click on the "New user" button.
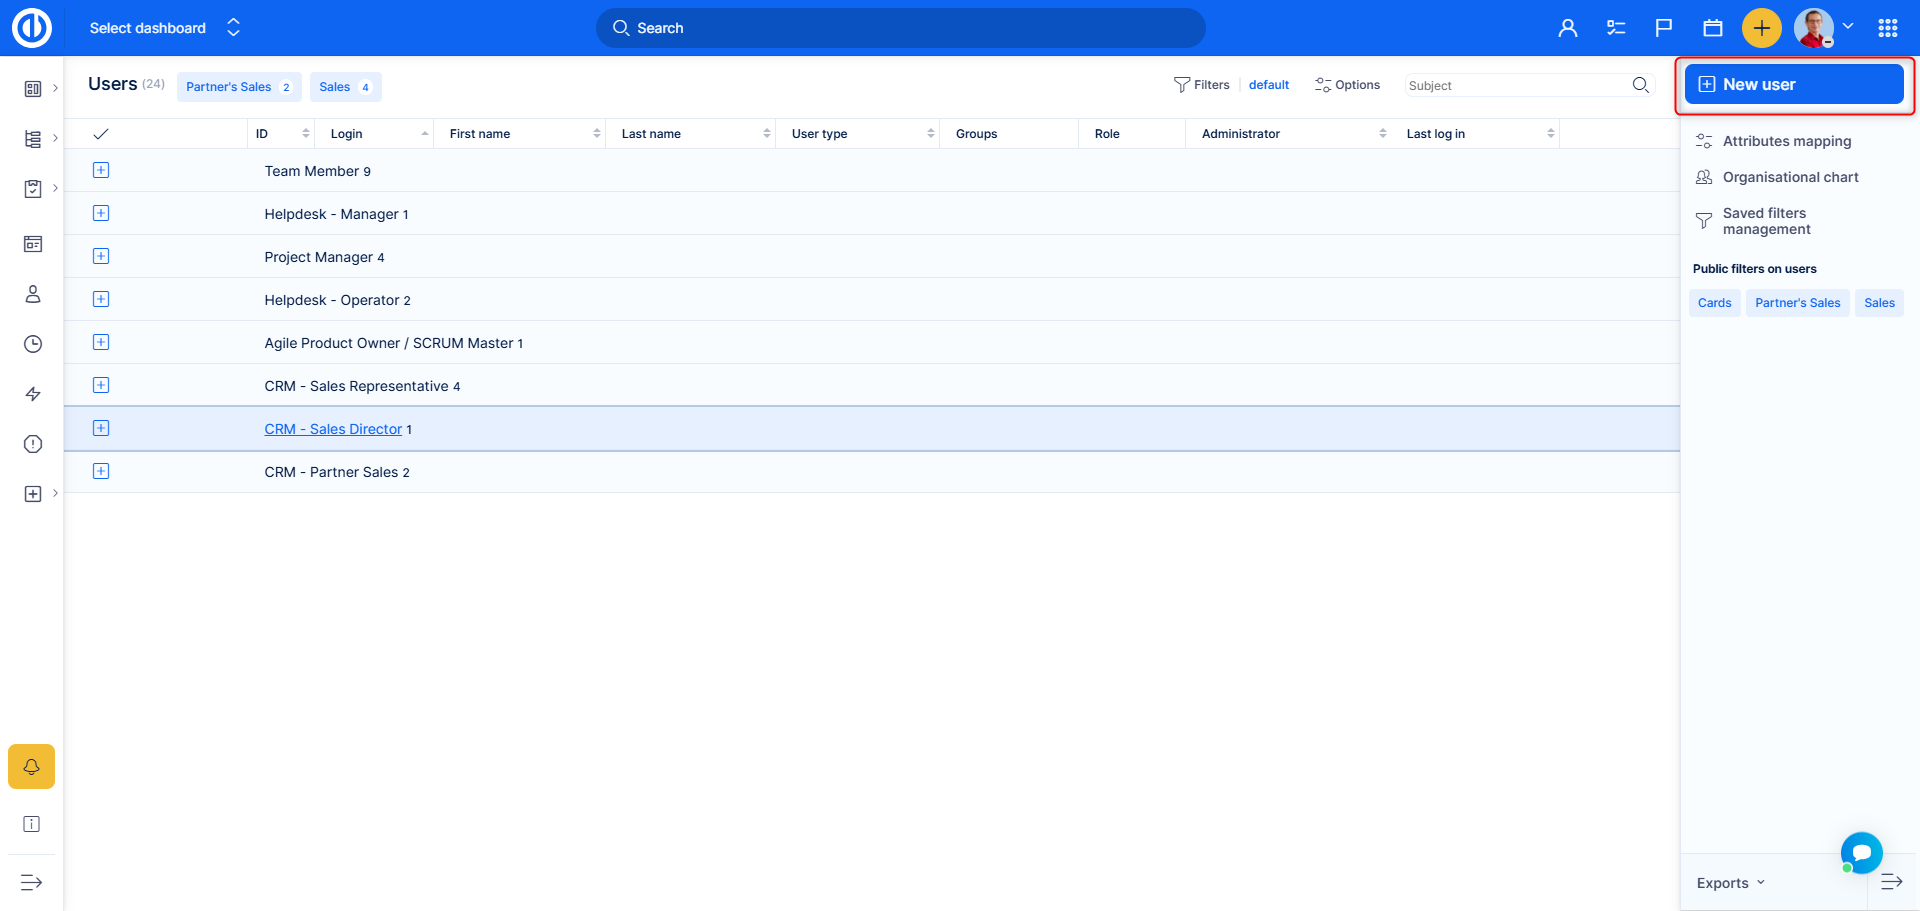
You will land on the following screen.
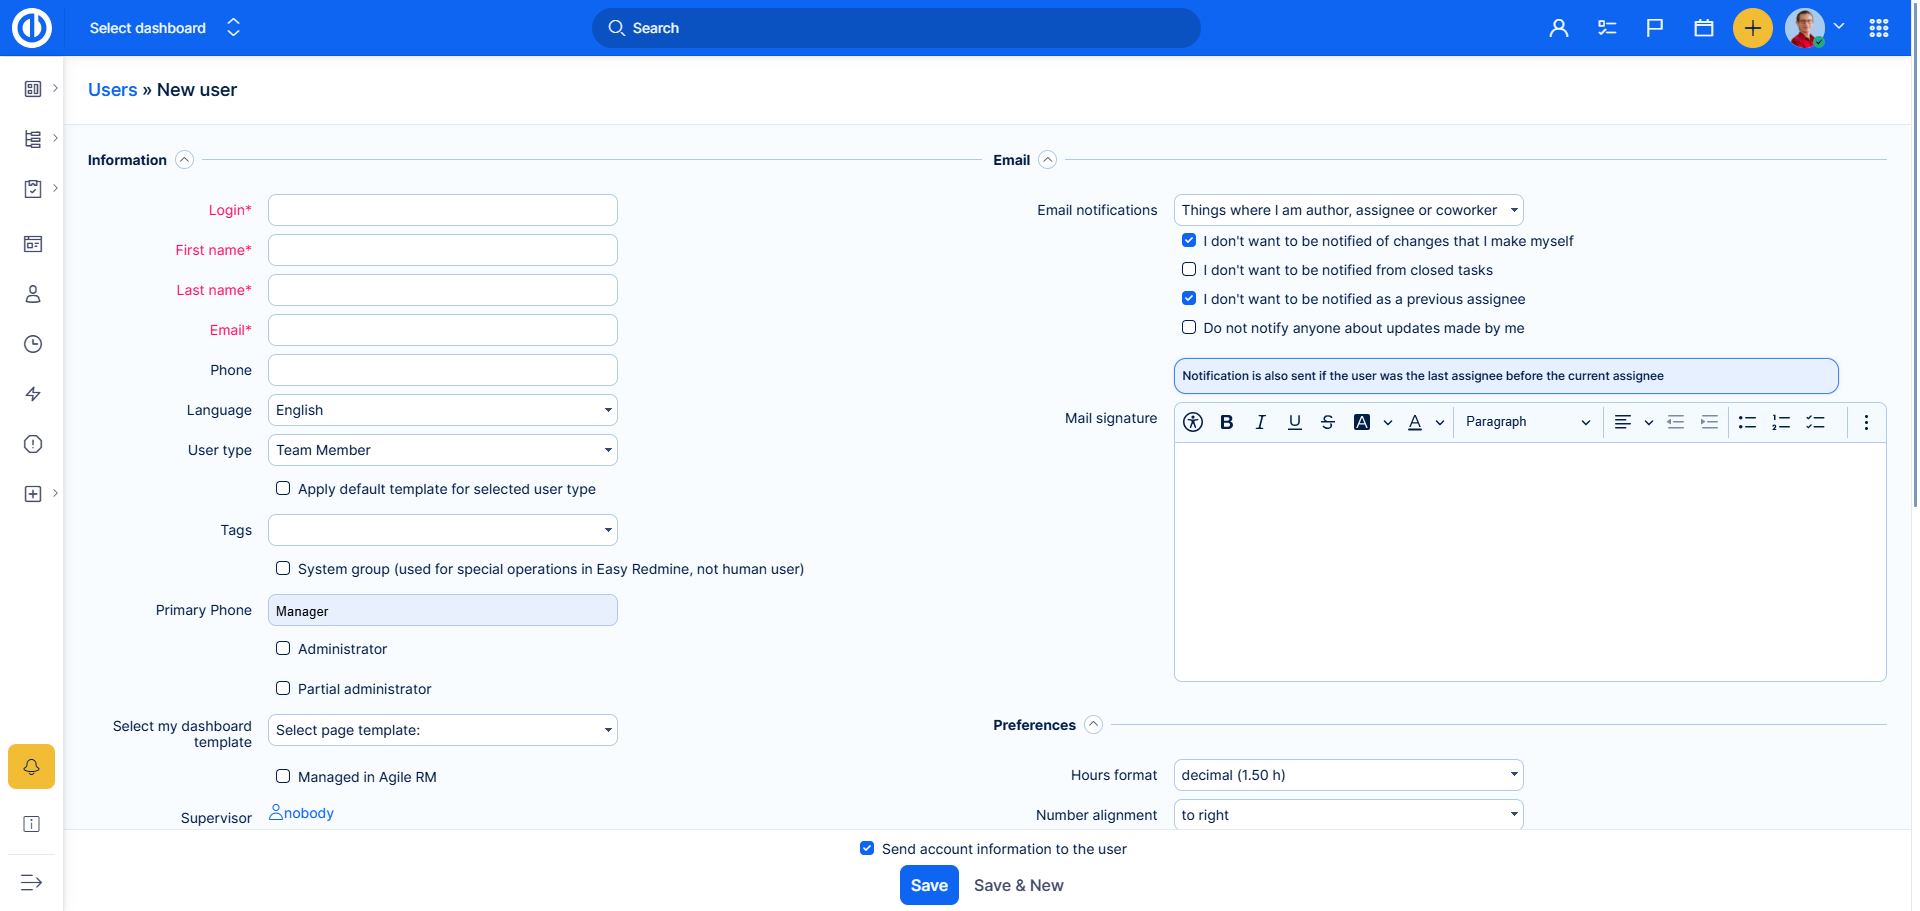
User settings
Information
Fill in the boxes for personal details according to your needs.
Language on a user profile is only available when the option "Force default language for logged-in users" is disabled in Administration >> Settings >> Display. It determines in which language the system will appear to this user.
User Type: Lets you assign a User type to the user. More details on what User type affects can be found here.
Apply default template for selected user type: automatically assigning a pre-configured template to a user based on their user type.
Tags are personalized labels/marks that can be attached to a user profile.
System group checkbox refers to a user that is used for operations using REST API, such as importing tasks from an external system. The user is included in purchased licenses. The user appears only at the necessary locations, otherwise, its state is hidden.
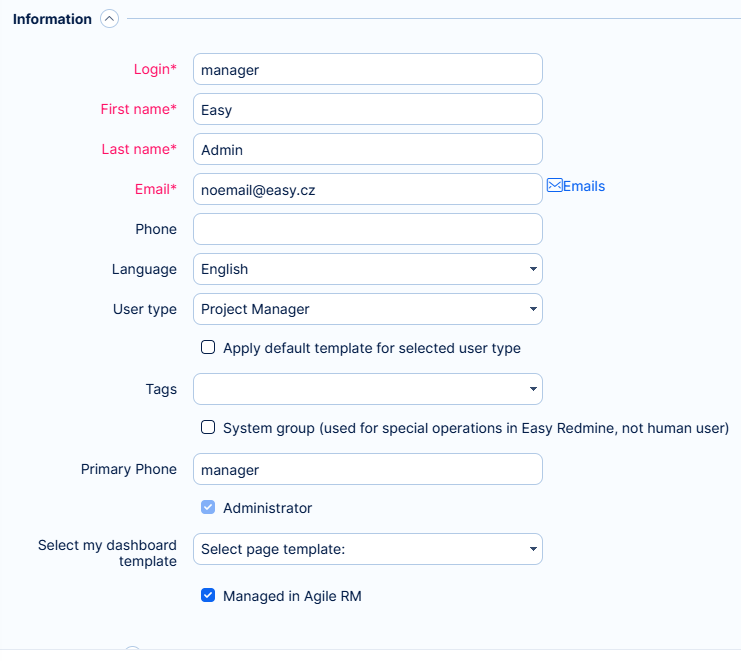
Administrator, partial administrator, non-administrator
Each user has one of the following statuses set in his user profile:
- Administrator - has all accesses and permissions within all areas of the application
- Partial administrator - has all accesses and permissions within the selected areas of the application
- Non-administrator - has only those accesses and permissions granted by his project membership(s), user role(s), and user type
Select dashboard template: is used to assign one of the predefined templates to this user.
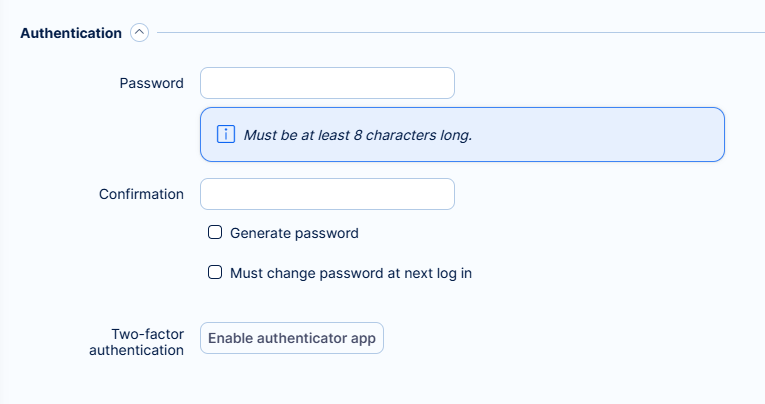
Authentication
Here, you can either set a password manually, generate a secure one, or require the user to create a new password upon their next login, ensuring flexibility and security during account setup.
Additionally, this is where you can activate and manage two-factor authentication (2FA) to enhance account protection with an extra layer of security.
Email notification and User signature
In this section, you can define which notifications the user will receive, ensuring they stay informed about relevant updates.
By granting the user the necessary permissions, they can manage and customize their own notification preferences. This allows them to tailor notifications to their specific needs without requiring admin intervention.
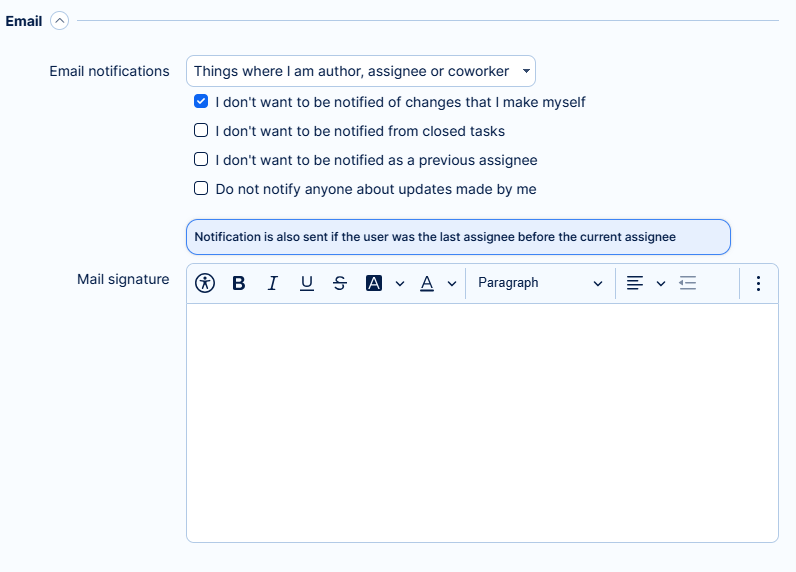
Notifications
There are the following options:
- For any events on all my projects
- For any event of selected projects only
- Things where I am author, assignee or co-worker
- Only for things I am assigned to
- Only for things I am the author of
- No events
Additional checkbox options include:
- I don't want to be notified of changes that I make myself
- I don't want to be notified from closed tasks
- I don't want to be notified as a previous assignee
- Do not notify anyone about updates made by me
Note: Notification is also sent if the user was the last assignee before the current assignee
Mail signature
The mail signature is used when sending emails through the HelpDesk plugin, adding a professional and consistent closing to your messages. It can include your name, role, company details, or any additional information to personalize your communication
Preferences
Preferences provide additional options to customize and enhance the user experience. These settings allow users to tailor the application to their specific needs.
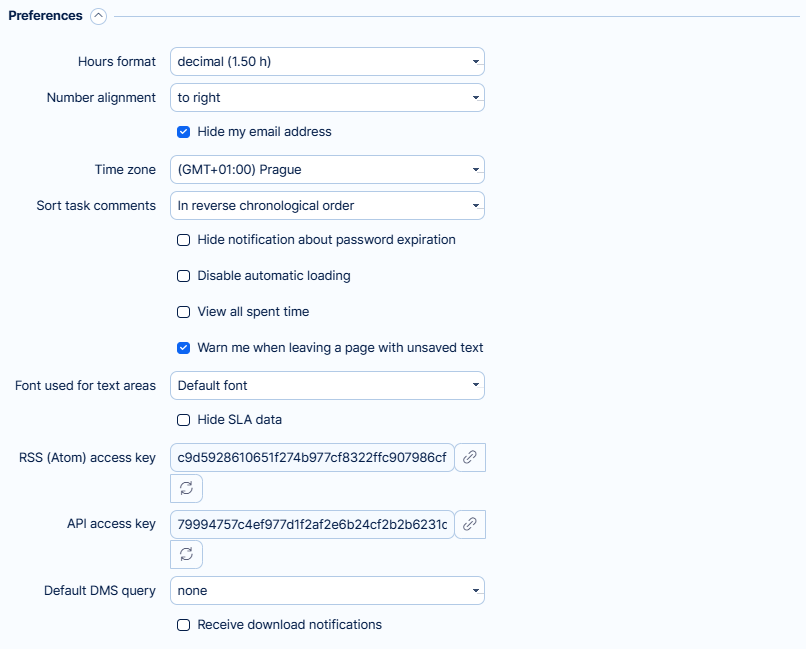
- Hours format: It can be selected in two ways, and it sets how the user sees the hours in the system.
- Number alignment: It sets how the user will see the numbers aligned.
- Hide my email address: Option to not show email address within the system.
- Time zone: You can set a time zone for each user individually. If you leave this field empty, the time zone will be calculated from the server timezone.
- Sort task comments: You can sort task comments in either chronological or reverse chronological order.
- Hide notification about password expiration allows you to turn off alerts or reminders that inform you when your password is about to expire.
- Disable automatic loading: This option prevents comments from loading automatically. Instead, it gives you the option to load them manually or navigate through them using pagination.
- View all spent time option allows you to see the total amount of time that has been logged.
- Warn me when leaving a page with unsaved text prompts a warning message if you try to navigate away from a page where you've entered text but haven't saved it. This helps prevent the loss of any unsaved changes by alerting you before you leave the page.
- Font used for text areas refers to the typeface or style of text that appears in input fields, text boxes, or other areas where users can enter or edit content.
- Default: This refers to the standard font set by the application.
- Monospaced: Each character occupies the same amount of space. This font is often used in coding environments or for aligning text precisely. Examples include Courier and Consolas.
- Proportional: Characters take up varying amounts of space depending on their width. This is the most common type of font used for regular text, such as Arial or Times New Roman. It allows for more natural and readable text.
- Hide SLA data option allows you to hide the Service Level Agreement (SLA) information from view. This can be useful if you don't want users to see SLA details, such as response or resolution times, or if you need to focus on other aspects of a task or project without the distraction of SLA metrics.
- Receive download notifications enables you to get notified whenever a file or document is downloaded. This can be helpful for tracking access to important files or ensuring that downloads are being handled appropriately.
External calendars
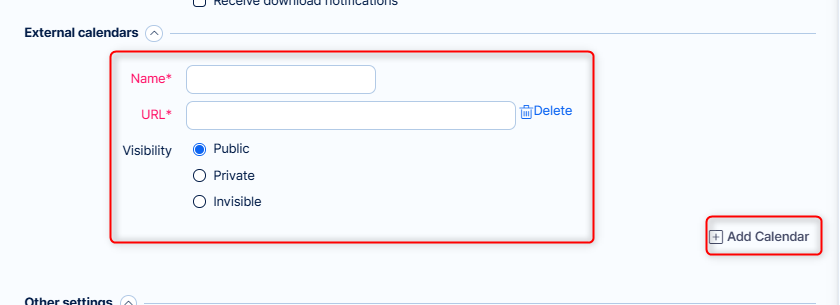
You can add one or more external calendars to a user profile, which function similarly to working time calendars. The key difference is that these external calendars are specific to the individual user profile and are not shared across other profiles.
To add a new calendar click on the respective button. Fill in the name, URL and set visibility.
Any added calendar can be removed by the Delete button.
Other settings
The last thing you can do is to apply roles and permissions of another user. When "Apply roles and permissions from user" option is selected when creating a new user or editing an existing one, please note that this does not apply to roles and permissions acquired via group membership(s) but solely to the personal roles and permissions of the particular user. Group membership(s) and related group roles and permissions cannot be copied from one user to another.

In the drop-down list, you will choose the user you want to apply for roles and permissions from.
After saving, you will find that the user has been added to projects along wiht a role assigned, based on the selected user.
How to add a user to a project via User profile
Once the user is created, and you did not use the option to apply roles of another user, you can proceed to assign them to projects.
There are a few ways to add a user to a project, via direct assignment or groups. In the user profile, there are tabs that allow you to view different aspects of the user's information. The "Groups" tab displays the groups the user is a part of, while the "Projects" tab shows the projects the user is associated with.
These tabs help you manage and navigate the user's roles and assignments efficiently.
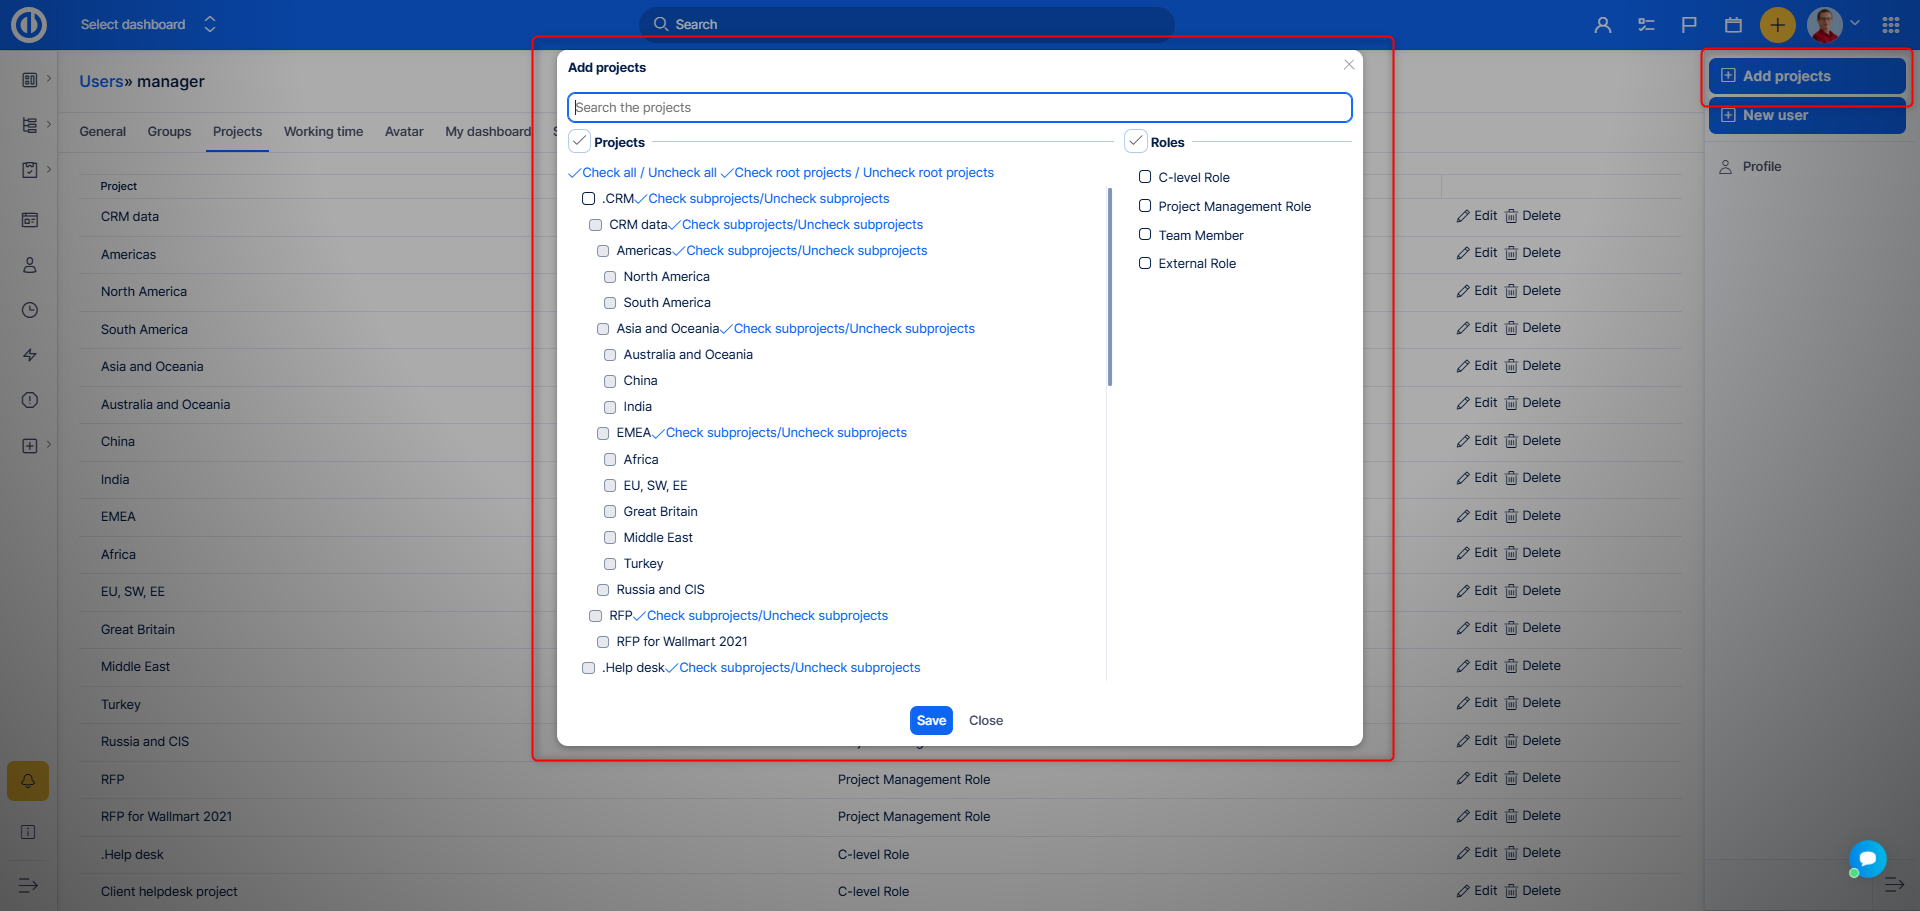
- To add a user separately, assigning them directly to the project. Go to the Project tab >> Add projects . a popup will appear where you can selecte multiple projects and multiple roles at once.
- To add user to a group , open the tab Groups Here you will find list of available groups, simply check the desired groups and save.

User will becom member of all rpojects of the selected groups, along with the assigned roles of the groups.
Note:
- You cannot add both a user and a group in one step, but you can first add the user and then assign them to a group, allowing the user to have both roles.
- You cannot add a user to a project if the user is already a member of a group that has been added to the project.
Corner situations
- When "Apply roles and permissions from user" option is selected when creating a new user or editing an existing one, please note that this does not apply to roles and permissions acquired via group membership(s) but solely to the personal roles and permissions of the particular user. Group membership(s) and related group roles and permissions cannot be copied from one user to another.
- Hours format setting on the user's profile does not apply to Timesheets as they always use the short format in order to avoid text overlapping with the long format.
- Partial administrator for the "Users" area does not have the ability to edit logins, passwords, e-mails and does not see the RSS + API key of administrators and partial administrators.
- Users can be grouped by their supervisors on the user's list. Users having no supervisor are gathered under the group "none". Due to a technical issue, the group "none" cannot be expanded to show included users.
